
Create a chat application with Ionic 5/ Angular 12/ Capacitor 3 and Django 3 – Series – Part five
Day 5 : Registering – Sign in users in our Ionic application
In previous day, we saw how to create a register page and how to register a user using our backend API.
Updating user profil
Now to complete the registration process, we need to update the created user with all the fields filled in the form (last name, first name), and need to get a JWT access token.
First we will create another service class to deal with some common methods to manage a user:
ionic g service UserManagerServiceand then we will move the created service in the services directory:
mv src/app/user-manager-service.service.* src/app/servicesWe will create an new file in the directory src/app/models/ named user.ts and will write the following code:
export class User {
    fcmdevice:any;
    password:string;
    last_login:string;
    is_superuser:any;
    id:any;
    email:string;
    first_name:string;
    last_name:string;
    date_joined:Date;
    is_active:boolean;
    is_staff:boolean;
    avatar:string;
    groups:any;
    user_permissions:any;
    lastConnexionDate : Date;
    valid:boolean;

    constructor() {

    }

    initWithJSON(json) : User{
      for (var key in json) {
          this[key] = json[key];
      }
      return this;
    }
}
This code is the User typescript object (similar to our User class in Django), which will be more easy to manipulate rather than dealing with JSON object.
To store objects (such as our User) on the disk, we will install Ionic storage library:
npm install @ionic/storage-angularand then add it in our /src/app/app.module.ts file:
import { NgModule } from '@angular/core';
import { BrowserModule } from '@angular/platform-browser';
import { RouteReuseStrategy } from '@angular/router';

import { IonicModule, IonicRouteStrategy } from '@ionic/angular';

import { AppComponent } from './app.component';
import { AppRoutingModule } from './app-routing.module';
import { HttpClient, HttpClientModule } from '@angular/common/http';
import { InAppBrowser } from '@ionic-native/in-app-browser/ngx';
import { IonicStorageModule } from '@ionic/storage-angular';

@NgModule({
  declarations: [AppComponent],
  entryComponents: [],
  imports: [
    IonicStorageModule.forRoot(),
    BrowserModule,
    HttpClientModule,
    IonicModule.forRoot(),
    AppRoutingModule
  ],
  providers: [
    InAppBrowser,
    { provide: RouteReuseStrategy, useClass: IonicRouteStrategy }
  ],
  bootstrap: [AppComponent],
})
export class AppModule {}
Now in our new src/app/services/user-manager-service.service.ts file we will add the following code:
import { Injectable } from '@angular/core';
import { Platform } from '@ionic/angular';
import { User } from '../models/user';
import { ApiserviceService } from './api-service.service';
import { Storage } from '@ionic/storage-angular';

@Injectable({
  providedIn: 'root'
})
export class UserManagerServiceService  {

  currentUser: User;

  constructor(public storage: Storage,
    public apiService: ApiserviceService,
     public platform: Platform) {
    console.log('-------- INIT UserManagerProviderService Provider --------- ');
    this.initStorage()
  }

  async initStorage() {
    console.log("==== INIT STORAGE ==========")
    // If using a custom driver:
    // await this.storage.defineDriver(MyCustomDriver)
    await this.storage.create();
  }

  saveUser() {
    this.storage.set(this.apiService.appName + '_currentUser', this.currentUser);
  }

  setUser(user) {
    return new Promise(resolve => {
        let aUser = new User().initWithJSON(user);
        this.currentUser = aUser;
        console.log('User ID ' + aUser.id + ' email ' + aUser.email);
       this.storage.set(this.apiService.appName + '_currentUser', user).then(()=>{
          resolve(true)
        })
     });
  }

  getUser() {
    return new Promise(resolve => {
      this.storage.get(this.apiService.appName + '_currentUser').then((result) => {
        console.log(result)
        if (result) {
          let aUser = new User().initWithJSON(result);
          this.currentUser = aUser;
          resolve(this.currentUser)
        }
        else {
          this.currentUser=null
          resolve(null)
        }
      });
    });
  }
}
Basically, we added methods to save a user on the disk, to get a previously saved user from the disk, and a method to set the user object in memory.
Before moving forward and write the code to finish the registration process, we need to create another service to deals with authentication and JWT token.
ionic g service Authentication
mv src/app/authentication.service.* src/app/services
Then we can edit our src/app/services/authentication.service.ts file to add methods to load existing JWT access token from disk, login or logout the user, and refresh the JWT access token :
import { Injectable } from '@angular/core';
import { BehaviorSubject, from, Observable, Subject } from 'rxjs';
import { ApiserviceService } from './api-service.service';

const TOKEN_KEY = 'access';
const REFRESH_TOKEN_KEY = 'refresh';

@Injectable({
  providedIn: 'root'
})
export class AuthenticationService {
  // Init with null to filter out the first value in a guard!
  isAuthenticated: BehaviorSubject<boolean> = new BehaviorSubject<boolean>(null);
  token = '';
  refresh=''
  constructor(private apiService:ApiserviceService) {
    this.loadToken();
  }

  loadToken() {
    this.apiService.getLocalData(TOKEN_KEY).then((value:string)=>{
      if (value){
        console.log('set token: ', value);
        this.token = value["access"];
        this.apiService.getLocalData(REFRESH_TOKEN_KEY).then((value:string)=>{
          this.refresh=value["refresh"]
          this.isAuthenticated.next(true);
        })
      }
      else{
        this.isAuthenticated.next(false);
      }
    })

  }

  //Get a JWT access token from provided credentials
  login(params){
    return new Promise(async resolve => {
    this.apiService.login(params).subscribe((resultat)=>{
       if (resultat) {
         console.log("Login result ",resultat)
          let accessToken = resultat["access"]
          let refreshToken = resultat["refresh"]
          this.apiService.setLocalData("access",{"access":accessToken})
          this.apiService.setLocalData("refresh",{"refresh":refreshToken})
          this.token = accessToken;
          this.refresh=refreshToken
          this.isAuthenticated.next(true);

         resolve(true)
        }
      else{
        resolve(false)
      }
      })
    })
  }

  logout(): Promise<void> {
    this.isAuthenticated.next(false);
    return new Promise(async resolve => {
       this.apiService.removeLocalData(TOKEN_KEY).then(()=>{
          this.apiService.removeLocalData(REFRESH_TOKEN_KEY).then(()=>{
            resolve()
          }
        )
       });
    })
  }

  refreshToken(){
    return this.apiService.refreshToken(this.refresh)
  }
}
Ok so now we are be able to modify our src/pages/register-page/register-page.page.ts file to include these new methods.
First we will modify the constructor of our class to include the new services UserManagerServiceService and AuthenticationService created:
constructor(
    public loadingController: LoadingController,
    public router: Router,
    public platform: Platform,
    public alertController: AlertController,
    public apiService: ApiserviceService,
    public formBuilder: FormBuilder,
    public inAppBrowser: InAppBrowser,
    public userManager:UserManagerServiceService,
    public authentificationService:AuthenticationService) {

    this.userForm = formBuilder.group({
      firstName: ['', Validators.compose([Validators.minLength(3), Validators.required])],
      lastName: ['', Validators.compose([Validators.minLength(3), Validators.required])],
      email: ['', Validators.compose([Validators.required, Validators.pattern('^[a-zA-Z0-9_.+-]+@[a-zA-Z0-9-]+.[a-zA-Z0-9-.]+$')])],
      password: ['', Validators.compose([
        Validators.minLength(8),
        Validators.required,
        Validators.pattern('(?=.*[a-z])(?=.*[A-Z])(?=.*[0-9])(?=.*[€$@$!%*?&])[A-Za-z\d$@€$!%*?&].{8,}')
      ])],
      confirmpassword: ['', Validators.compose([
        Validators.minLength(8),
        Validators.required,
        Validators.pattern('(?=.*[a-z])(?=.*[A-Z])(?=.*[0-9])(?=.*[€$@$!%*?&])[A-Za-z\d$@€$!%*?&].{8,}')
      ])],
    });

  }
And now we can modify our createAccount method to complete the process:
createAccount(params) {
    if (this.apiService.networkConnected) {
      this.apiService.registerUser(params).subscribe((resultat) => {
        let status = resultat["status"];
        console.log(status)
        if (status == "OK") {
          this.apiService.stopLoading();
          //User created
          let data = resultat["data"]
          console.log(data)

          //Set user on memory and save on disk
          this.userManager.setUser(data)

          let paramsToLogin = {
            "email": params.email,
            "password": params.password,

          }

          // Log the user to get the JWT access token
          this.authentificationService.login(paramsToLogin).then((resultat) => {
            if (resultat) {
              //Need to update first_name and lastname and lastConnexionDate
              let updateParams = {
                "first_name": params.firstName,
                "last_name": params.lastName,
                "lastConnexionDate": new Date()
              }
              this.apiService.updateUser(this.userManager.currentUser.id, updateParams).subscribe((done) => {
                console.log("resultat update ", done)
              })

              this.userManager.saveUser()
              // Next screen
              console.log("===Can go to next screen")
            }
            else {
              this.apiService.stopLoading();
              this.apiService.showError("An error occured with credentials")
            }
          })
        }
        else {
          this.apiService.stopLoading();
          let error = resultat["error"]
          console.log(error)
          if (error.status == 400) {
            this.apiService.showError('An account already exists for this email. Please login');
          }
          else {
            this.apiService.showError("An error occured")
          }
      }
      })
    }
    else {
      this.apiService.stopLoading();
      this.apiService.showNoNetwork()
    }
  }
Once the user has been created, we can now save the results on disk:
//Set user on memory and save on disk
this.userManager.setUser(data)
Then we can use the credentials to login and get the JWT access token from the backend, and then if we have a results it means we have the access token, so we can update the user with it’s missing fields (last name, first name, last connexion date), then we can save again the user value to the disk, and then we should be able to continue and go to the main page of our application (which doesn’t exist yet). This is the purpose of this piece of code:
 let paramsToLogin = {
            "email": params.email,
            "password": params.password,
          }

// Log the user to get the JWT access token
this.authentificationService.login(paramsToLogin).then((resultat) => {
    if (resultat) {
        //Need to update first_name and lastname and lastConnexionDate
        let updateParams = {
                "first_name": params.firstName,
                "last_name": params.lastName,
                "lastConnexionDate": new Date()
              }

        this.apiService.updateUser(this.userManager.currentUser.id, updateParams).subscribe((done) => {
            console.log("resultat update ", done)
        })

        this.userManager.saveUser()

        // Next screen
        console.log("===Can go to next screen")
    }
    else {
            this.apiService.stopLoading();
            this.apiService.showError("An error occured with credentials")
        }
    })
Please notice that the else code should not exists because we are in the registration process, so credentials can’t be incorrect because we just created the user account with these credentials.
To complete our job, we need to create the following methods which don’t exists yet in our ApiService:
- this.apiService.login(params)
- this.apiService.updateUser(this.userManager.currentUser.id, updateParams)
And because we need to be authenticated to call our backend API endoints User, Chat, Message, we will also need to manage the JWT access token and add it automatically to each request we make (in the Http header of the request).
login method
The login method will call the /jwt/create/ API endpoint with provided credentials to get the JWT access and refresh tokens.
Edit the /src/app/services/api-service.service.ts file to add the following code:
 login(params) {
    const options = {
      headers: new HttpHeaders({
        'Content-Type': 'application/json'
      })
    };

    console.log("URL " + this.getLoginUrl)
    console.log(params)
    return new Observable(observer => {
      this.http.post(this.getLoginUrl, params, options).subscribe(
        (val) => {
          observer.next(val)
          observer.complete()
        },
        response => {
          console.log("POST call in error", response);
          observer.next()
          observer.complete()
        },
        () => {

        });
    })
  }
If the API call succeed, we should receive a JSON containing the access and refresh tokens as we learned in day two of these tutorials.
{refresh: "eyJ0eXAiOiJKV1QiLCJhbGciOiJIUzI1NiJ9.eyJ0b2tlbl90e…Q1In0.E8lFvotzMA2G5-ciJqUIyRVnNot3tmwrZJlts_dJfuw", access: "eyJ0eXAiOiJKV1QiLCJhbGciOiJIUzI1NiJ9.eyJ0b2tlbl90e…DUifQ.lqMuEyd1J5IetaJmlvFgjcEunB7NcjxoUc2E5zdr7A4"}update user method
The updateUser method will call the HTTP Patch method of our User endpoint to set first name, last name and lastConnexionDate.
 updateUser(id, patchParams) {
    const options = {
      headers: new HttpHeaders({
        'Content-Type': 'application/json'
      })
    };
    return Observable.create(observer => {
      // At this point make a request to your backend to make a real check!
      this.http.patch(this.getUserUrl + id + "/", patchParams, options)
        .pipe(retry(1))
        .subscribe(res => {
          this.networkConnected = true
          observer.next(true);
          observer.complete();
        }, error => {
          observer.next(false);
          observer.complete();
          console.log(error);// Error getting the data
        });
    });
  }
If we wanted to update the full User object (all fields) we should have made a PUT request and not a Patch one.
Now you can run again the ionic application:
ionic serveand try to register. Then if you look at the javascript console, you should see the JWT access and refresh tokens but the update of the user will fail with an HTTP 401 error code.
PATCH http://127.0.0.1:8000/api/user/59d99e58-2a32-430a-b20d-96386f0514af/ 401 (Unauthorized)As we learned to call our API endpoints we need to be authenticated and add the JWT token in the header of the request.
One of the simple solution could be to pass the JWT Token to our updateUser method
this.apiService.updateUser(this.userManager.currentUser.id, updateParams,this.authentificationService.token).subscribe((done) => {
                console.log("resultat update ", done)
})
and modify the updateUser method to add it in the headers of the request:
updateUser(id, patchParams,accessToken) {
    const options = {
      headers: new HttpHeaders({
        'Content-Type': 'application/json',
        'Authorization': 'Bearer '+accessToken
      })
    };
    return Observable.create(observer => {
      // At this point make a request to your backend to make a real check!
      this.http.patch(this.getUserUrl + id + "/", patchParams, options)
        .pipe(retry(1))
        .subscribe(res => {
          this.networkConnected = true
          observer.next(true);
          observer.complete();
        }, error => {
          observer.next(false);
          observer.complete();
          console.log(error);// Error getting the data
        });
    });
  }
Now if we try to register again, everything should be fine and our User should be updated with specified values (which you can check using the Django admin).
Passing the JWT token to the method is not really the solution because tokens can expire and we need a more generic way to deal with this problem. We will learn how to do soon but first let’s write the login page code.
Login user
We will create the login page and move the code to our src/app/pages directory:
ionic g page LoginPage
mv src/app/login-page src/app/pages
Then we will edit the src/app/app-routing.module.ts file to reflect the directory change :
import { NgModule } from '@angular/core';
import { PreloadAllModules, RouterModule, Routes } from '@angular/router';

const routes: Routes = [
  {
    path: 'register-page',
    loadChildren: () => import('./pages/register-page/register-page.module').then( m => m.RegisterPagePageModule)
  },
  {
    path: 'login-page',
    loadChildren: () => import('./pages/login-page/login-page.module').then( m => m.LoginPagePageModule)
  },

];

@NgModule({
  imports: [
    RouterModule.forRoot(routes, { preloadingStrategy: PreloadAllModules })
  ],
  exports: [RouterModule]
})
export class AppRoutingModule {}
As we have done for our register page, we will have a form in which the user can enters it’s email and password. Furthermore we will add a link to redirect to the register page, if the user has no account.
Let’s edit the login-page.module.ts to include the Angular ReactiveFormsModule:
import { NgModule } from '@angular/core';
import { CommonModule } from '@angular/common';
import { FormsModule } from '@angular/forms';
import { ReactiveFormsModule } from '@angular/forms';

import { IonicModule } from '@ionic/angular';

import { LoginPagePageRoutingModule } from './login-page-routing.module';

import { LoginPagePage } from './login-page.page';

@NgModule({
  imports: [
    CommonModule,
    FormsModule,
    ReactiveFormsModule,
    IonicModule,
    LoginPagePageRoutingModule
  ],
  declarations: [LoginPagePage]
})
export class LoginPagePageModule {}
Then we can write our login-page.page.html code:
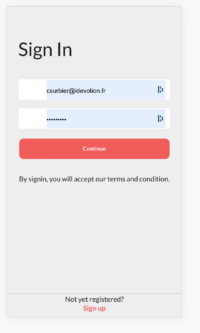
<ion-content color="medium" padding padding-24>
  <div class="auth-container">
    <div class="form">
      <div class="form-title">
        Sign In
      </div>
      <form [formGroup]="userForm">
      <ion-list lines="none" mode="ios" login-form>
        <ion-item mode="ios">
          <ion-icon class="sw-email-solid" slot="start"></ion-icon>
          <ion-input mode="ios" type="email" placeholder="Email"  name="email" formControlName="email" [class.invalid]="!userForm.controls.email.valid && (userForm.controls.email.dirty || submitAttempt)"></ion-input>
        </ion-item>
         <ion-item *ngIf="!userForm.controls.email.valid  && (userForm.controls.email.dirty || submitAttempt)">
              <p>An email is required
              </p>
          </ion-item>

        <ion-item mode="ios">
          <ion-icon class="sw-lock-sold" slot="start"></ion-icon>
          <ion-input mode="ios" type="password"  placeholder="Password" formControlName="password" [class.invalid]="!userForm.controls.password.valid && (userForm.controls.password.dirty || submitAttempt)"></ion-input>
        </ion-item>
         <ion-item *ngIf="!userForm.controls.password.valid  && (userForm.controls.password.dirty || submitAttempt)">
              <p>min. 8 characters required with lowercase, uppercase, number and special character</p>
          </ion-item>
      </ion-list>
      <div class="buttons-forgot" text-right>

        <ion-button mode="ios" expand="block" color="danger" [disabled]="!userForm.valid" (click)="login()">
          Sign in
        </ion-button>
      </div>

      </form>
      <p class="instruction" (click)="cgu()">By signin, you will accept our terms and condition.</p>
    </div>
  </div>
</ion-content>
<ion-footer no-border mode="ios" auth>
  <ion-toolbar color="medium" mode="ios" text-center>
    <div class="option-auth">
      <p>Not yet registered?</p>
      <ion-button fill="clear" expand="block" routerLink="/register-page" mode="ios" color="danger">Sign up</ion-button>
    </div>
  </ion-toolbar>
</ion-footer>
And write the associated scss login-page.page-scss:
.buttons-forgot {
    ion-button {
        &.forgot-password {
            font-size: 15px;
            margin: 0;
            min-height: unset;
            height: 34px;
            margin-bottom: 12px;
        }
    }
}

.option-auth{
    display: flex;
    flex-direction: column;
    align-items: center;
}
p {
    font-size: 0.8em;
    color: red;
}
The Login page is really simple. It just displays two inputs box for email and password, a clickable text to see the terms & conditions, a button to login and a button to redirect to the Register page.
Let’s write our src/app/pages/login.page/login-page.page.ts file :
import { Component, OnInit } from '@angular/core';
import { Router } from '@angular/router';
import { LoadingController, Platform, AlertController } from '@ionic/angular';
import { InAppBrowser } from '@ionic-native/in-app-browser/ngx';
import { AuthenticationService } from 'src/app/services/authentication.service';
import { UserManagerServiceService } from 'src/app/services/user-manager-service.service';
import { ApiserviceService } from 'src/app/services/api-service.service';
import { FormBuilder, FormGroup, Validators } from '@angular/forms';

@Component({
  selector: 'app-login-page',
  templateUrl: './login-page.page.html',
  styleUrls: ['./login-page.page.scss'],
})
export class LoginPagePage implements OnInit {

  public userForm: FormGroup;

  loading: any;
  constructor(
    public loadingController: LoadingController,
    public router: Router,
    public platform: Platform,
    public formBuilder: FormBuilder,
    public userManager: UserManagerServiceService,
    public alertController: AlertController,
    public apiService: ApiserviceService,
    public authentificationService: AuthenticationService,
    public inAppBrowser: InAppBrowser) {

    this.userForm = formBuilder.group({
      email: ['', Validators.compose([Validators.required, Validators.pattern('^[a-zA-Z0-9_.+-]+@[a-zA-Z0-9-]+.[a-zA-Z0-9-.]+$')])],
      password: ['', Validators.compose([
        Validators.minLength(8),
        Validators.required,
        Validators.pattern('(?=.*[a-z])(?=.*[A-Z])(?=.*[0-9])(?=.*[€$@$!%*?&])[A-Za-z\d$@€$!%*?&].{8,}')
      ])]
    });
  }

  ngAfterViewInit() {

  }

  login() {

    let email = this.userForm.value["email"]
    let password = this.userForm.value["password"]

    //chek si le pseudo est disponible
    if (this.apiService.networkConnected) {
      this.apiService.showLoading();
      // Check email
      // Check email
      let params = {
        "email": email,
        "password": password,
      }
      this.authentificationService.login(params).then((resultat) => {
        this.apiService.stopLoading();
        if (resultat) {
          this.apiService.findUserWithQuery("?email="+email,this.authentificationService.token).subscribe((list) => {
         {
            if (list) {
              let count = list["count"]
              console.log("Count " + count)
              if (count == 0) {
                this.apiService.showError('Identification failed ! No account found');
              }
              else {
                let result = list["results"][0]
                console.log(result)
                this.userManager.setUser(result).then((done) => {
                   // Next screen
                  console.log("===Can go to next screen")
                })

              }
            }
            else {
              this.apiService.showError("An error occured with credentials, no account found")
            }

          })
        }
        else {
          this.apiService.showError("An error occured with credentials")
        }
      })
    }
    else {
      this.apiService.showNoNetwork();
    }

  }

  cgu(){
    let url = "https://policies.google.com/terms"
    let target = "_blank"
    this.inAppBrowser.create(url, target, "location=no,zoom=no")
  }

  ngOnInit() {
  }
}
Like for the Register page, we configure our Angular form to manage the email and the password:
 this.userForm = formBuilder.group({
      email: ['', Validators.compose([Validators.required, Validators.pattern('^[a-zA-Z0-9_.+-]+@[a-zA-Z0-9-]+.[a-zA-Z0-9-.]+$')])],
      password: ['', Validators.compose([
        Validators.minLength(8),
        Validators.required,
        Validators.pattern('(?=.*[a-z])(?=.*[A-Z])(?=.*[0-9])(?=.*[€$@$!%*?&])[A-Za-z\d$@€$!%*?&].{8,}')
      ])]
    });
Email is required and the input should be an email format.
Password is required and should have 8 caracters minimum, with number and special caracter.
The login() method will check the credentials of the user using our AuthentificationService:
 let params = {
        "email": email,
        "password": password,
      }
      this.authentificationService.login(params).then((resultat) => {
And if credentials are correct, we will retrieve the user using a new method which we need to create:
this.apiService.findUserWithQuery("?email="+email,this.authentificationService.token).subscribe((list) => {As we did before, for simplication and demo purpose, we will pass the JWT access token to the method.
If the method has a result, we can set our User and then go to next screen otherwise we need to display an error message.
Adding methods to deal with User in our APIService
In Register process, we added an updateUser method. Now let’s write all CRUD methods to deal with User.
Let’s add the following methods to our src/app/services/api-service.service.ts:
 // Create a user
  createUser(modelToCreate,accessToken) {
    // model JSON
    const options = {
      headers: new HttpHeaders({
        'Content-Type': 'application/json',
        'Authorization': 'Bearer '+accessToken
      })
    };
    console.log("URL " + this.getUserUrl)
    return this.http.post(this.getUserUrl, modelToCreate, options).pipe(retry(1))
  }

  //Find user based on parameters
  findUserWithQuery(query,accessToken) {
    let url = this.getUserUrl + query;
    return this.findUser(url,accessToken)
  }

  private findUser(url,accessToken) {
    const options = {
      headers: new HttpHeaders({
        'Content-Type': 'application/json',
        'Authorization': 'Bearer '+accessToken
      })
    };

    return Observable.create(observer => {
      this.http.get(url, options)
        .pipe(retry(1))
        .subscribe(res => {
          observer.next(res);
          observer.complete();
        }, error => {
          observer.next();
          observer.complete();
          console.log(error);// Error getting the data
        });
    });
  }

  getUserDetails(id,accessToken) {
    const options = {
      headers: new HttpHeaders({
        'Authorization': 'Bearer '+accessToken,
        'Content-Type': 'application/json'
      })
    };
    return Observable.create(observer => {
      this.http.get(this.getUserUrl + id + "/", options)
        .pipe(retry(1))
        .subscribe(res => {
          this.networkConnected = true
          observer.next(res);
          observer.complete();
        }, error => {
          observer.next(false);
          observer.complete();
          console.log(error);// Error getting the data
        });
    });
  }

  updateUser(id, patchParams,accessToken) {
    const options = {
      headers: new HttpHeaders({
        'Content-Type': 'application/json',
        'Authorization': 'Bearer '+accessToken
      })
    };
    return Observable.create(observer => {
      this.http.patch(this.getUserUrl + id + "/", patchParams, options)
        .pipe(retry(1))
        .subscribe(res => {
          this.networkConnected = true
          observer.next(true);
          observer.complete();
        }, error => {
          observer.next(false);
          observer.complete();
          console.log(error);// Error getting the data
        });
    });
  }

  putUser(object,accessToken) {
    const options = {
      headers: new HttpHeaders({
        'Content-Type': 'application/json',
        'Authorization': 'Bearer '+accessToken
      })
    };
    return Observable.create(observer => {
      this.http.put(this.getUserUrl + object.id + "/", object, options)
        .pipe(retry(1))
        .subscribe(res => {
          this.networkConnected = true
          observer.next(true);
          observer.complete();
        }, error => {
          observer.next(false);
          observer.complete();
          console.log(error);// Error getting the data
        });
    });
  }

  deleteUser(id,accessToken) {
    const options = {
      headers: new HttpHeaders({
        'Content-Type': 'application/json',
        'Authorization': 'Bearer '+accessToken
      })
    };
    return this.http.delete(this.getUserUrl + id + "/", options).pipe(retry(1))
  }
Redirect user to login page
Now we will add as default route our login page. Edit the src/app/app-routing.module.ts file and add this path :
 {
    path: '',
    redirectTo: 'login-page',
    pathMatch: 'full'
  },
With this instruction, every request with no relative path will be redirected to the /login-page url. So if you try to run ionic again:
ionic serveYou browser will launch at http://localhost:8100/ and will be automatically redirected to the login page http://localhost:8100/login-page
Now you should be able to login with the account created with the Register page and see the successful login in the console log
Login result  {refresh: "eyJ0eXAiOiJKV1QiLCJhbGciOiJIUzI1NiJ9.eyJ0b2tlbl90e…YwIn0.URQGnnZ9g3Ms8QdCC3JPT0ChKX1X-WL85XgyQAj9jKs", access: "eyJ0eXAiOiJKV1QiLCJhbGciOiJIUzI1NiJ9.eyJ0b2tlbl90e…jAifQ.v2kCSHwK9TAIhUSzrBbYGgG4nZTg5wWu3SMxs9peCFA"}
login-page.page.ts:67 Count 1
login-page.page.ts:73 {id: "3cde3f7e-261e-4ebb-8437-fa4c27d35bf0", password: "pbkdf2_sha256$216000$adrKF75lkxvH$kxQL19HuzE4Qsp+e3SPsZYSxkJrP7wFW6TercA9K7hc=", is_superuser: false, email: "christophe@idevotion.fr", first_name: "Christophe", …}
user-manager-service.service.ts:38 User ID 3cde3f7e-261e-4ebb-8437-fa4c27d35bf0 email christophe@idevotion.fr
login-page.page.ts:76 ===Can go to next screen
The source code of this tutorial could be found on my Github repository.
Questions / Answers
-
Which Angular library can we use to manage forms easily ?
Reactive forms
-
What should we add to an HTTP request to be authenticated ?
A JWT access token
- How to do that ?
Add a ‘Authorization’: ‘Bearer ‘+accessToken instruction in the HTTP headers of the request
- Which file is used in Ionic to manage the authorized urls ?
app-routing.module.ts file