- Share on
oAuth2 with Django Rest Framework : How to secure your API
May 2019Introduction to Django oAuth Toolkit
Django oAuth Toolkit is a library to add oAuth2 authentification.
In our previous tutorial we start building an API, and will be able to use it without any authentification. The problem with this approach is that everybody can access this API and browse our data (even sensitive private data) or even worse delete some data. To avoid this hole of security, we are going to add oAuth2 authentification to our API. With oAuth2 to get access to an API, you need to provide a token. Without this token, the access to the API will be denied. To obtain a token, you need to call a specific url with credentials.
Install Django oAuth Toolkit
To install the framework, will will add the following line in our requirements.txt file
django-oauth-toolkitTo install the packages, don't forget to launch in your terminal:
pip3 install -r requirements.txtNow we need to reference the library in our settings.py file
'oauth2_provider',
INSTALLED_APPS = [
    'jet',
    'backoffice.apps.BackofficeConfig',
    'django.contrib.admin',
    'django.contrib.auth',
    'django.contrib.contenttypes',
    'django.contrib.sessions',
    'django.contrib.messages',
    'django.contrib.staticfiles',
    'rest_framework',
    'rest_framework_docs',
    'oauth2_provider',
    ]
In our urls.py file we will add the endpoint of oAuth2 to obtain a token. So we add:
path('o/', include('oauth2_provider.urls')),Final step of the installation is to apply the change to our database, since Django Oauth Toolkit is using it's own tables.
python3 manage.py migrate
If you encounter errors during the migration it's because Django 2.1 drops the support of PostgreSQL 9.3, so we need to migrate our database to a new server. Don't worry since we are using Clever cloud services, it will be very simple. Just go to your clever console and to your PostgreSQL add-on. You will find a menu (please refer to screenshot) Migrate. 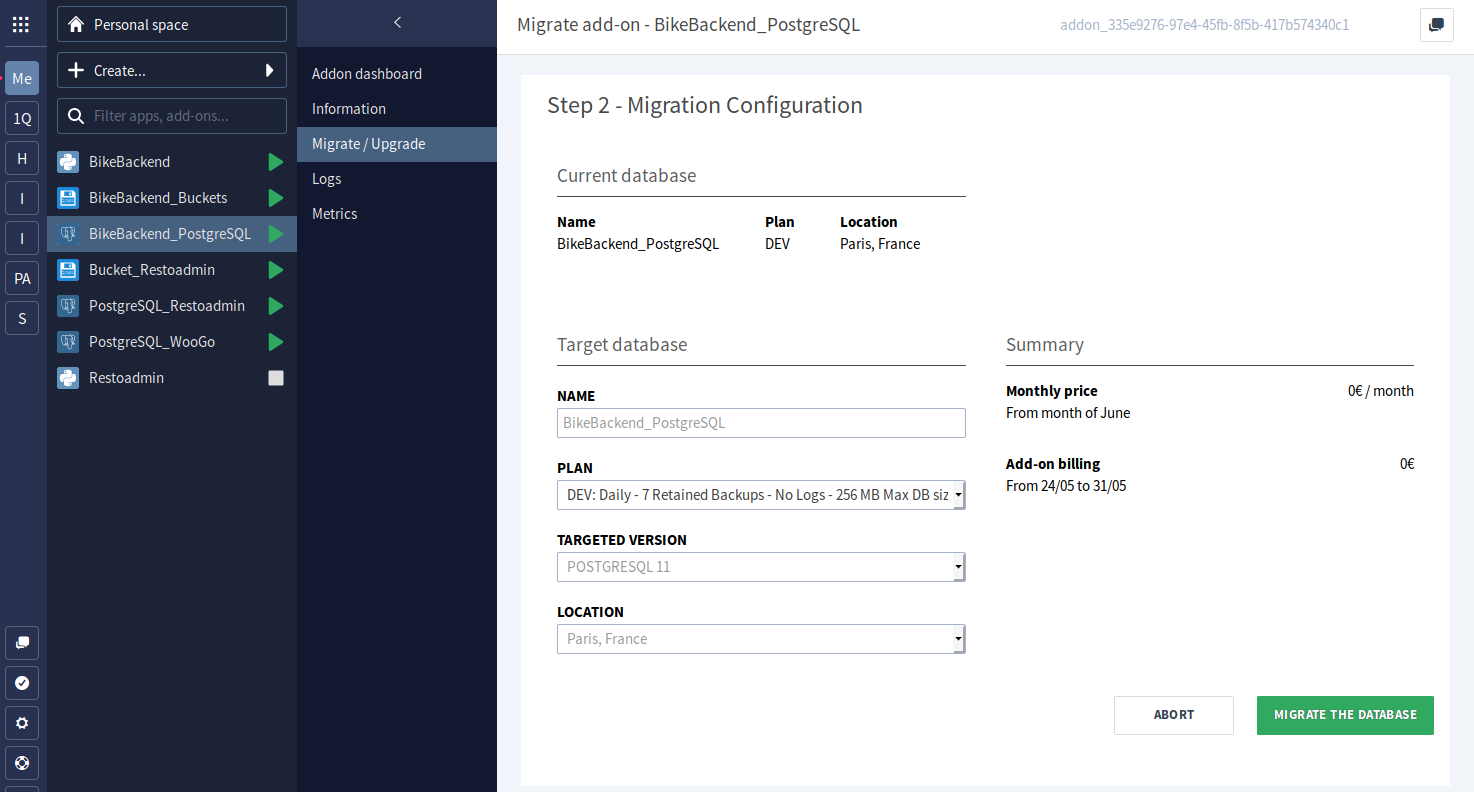
From this migration tool, you should be able to select the new PostgreSQL version (11) and migrate easily.
Then don't forget to change your database connection information in your local environments variables since host, database name,... have changed. Once your settings are ok, you can launch the
python3 manage.py migrate
Now if we go back to our admin backoffice, we should be able to see a new section dedicated to Django oAuth Toolkit 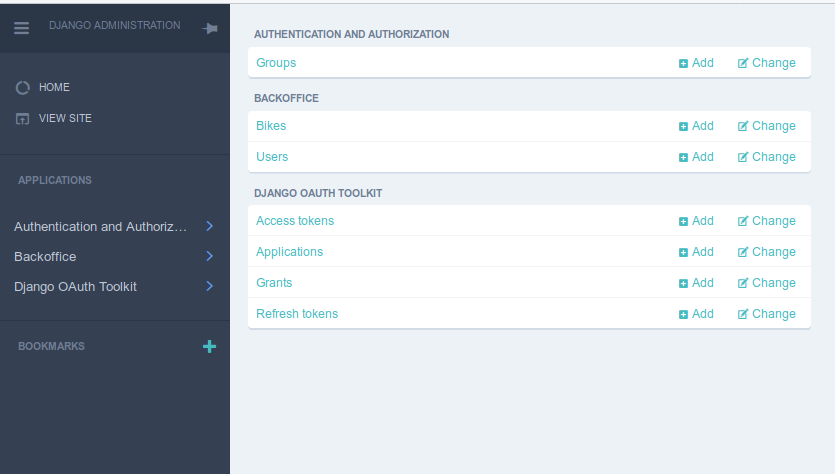
We are now going to declare a new Application to finalize the Django oAuth toolkit. Before doing so, we need to create a new user and give him the superuser status, then this user will be used by oAuth2 toolkit. If you don't want to create a new user, and use your own user with oAuth2, it's also possible. But in that case, remember it and never delete your user OR the oAuth2 will not work properly anymore.
In the admin interface, click the Add applications, and fillup the form: 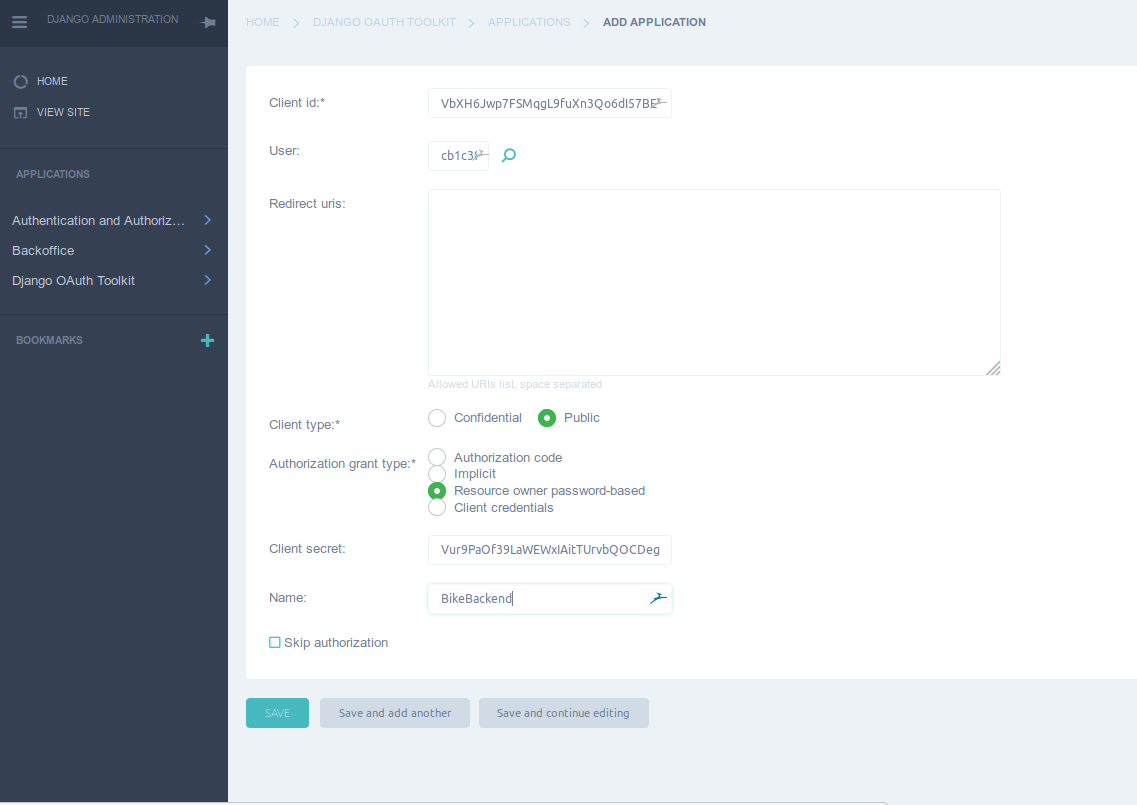
| ClientId: | Auto generated |
| User: | Please select the user you want to use |
| client type: | Please select public |
| Authorization grand type: | Please select Resource owner password |
| Client secret: | Auto generated |
| Name: | Give the name you want |