- Share on
Protect your API endpoints with Django oAuth2 toolkit
May 2019Now that everything is in place to protect our API, we need to tell Django Rest framework that our endpoints are protected. To do so, just modify our views.py in our api folder to add the following line:
permission_classes = [permissions.IsAuthenticated]or the full code:
class UserListCreateView(generics.ListCreateAPIView):
    """
            create:
                add users
            get:
                Search or get users
                You can search using:
                    :param email
                    :param username
    """
    permission_classes = [permissions.IsAuthenticated]
    queryset = User.objects.all()
    serializer_class = UserSerializer
    filter_backends = (DjangoFilterBackend,)
    filterset_fields = ('email', 'username')
The permission line indicates that now our API is protected and can't be access without authentification. We also need to modify the settings.py file to indicate to Django Rest Framework, that we are using Django oAuth toolkit to protect the endpoints.
#Rest
REST_FRAMEWORK = {
     'DEFAULT_AUTHENTICATION_CLASSES': (
       'oauth2_provider.contrib.rest_framework.OAuth2Authentication',
     #  'rest_framework.authentication.BasicAuthentication',
    ),
    'DEFAULT_FILTER_BACKENDS': ('django_filters.rest_framework.DjangoFilterBackend',),
    'DEFAULT_RENDERER_CLASSES': (
        'rest_framework.renderers.JSONRenderer',
        'rest_framework.renderers.BrowsableAPIRenderer',
    ),
    'DEFAULT_PAGINATION_CLASS': 'rest_framework.pagination.PageNumberPagination',
    'PAGE_SIZE': 20,
}
The important configuration line is:
'oauth2_provider.contrib.rest_framework.OAuth2Authentication',
So now if you try to access to API such as getting the user list (using Postman or the Live API endpoints), you should received an Http 401 status code (unauthorized access) and an error message telling you that you are not authenticated. 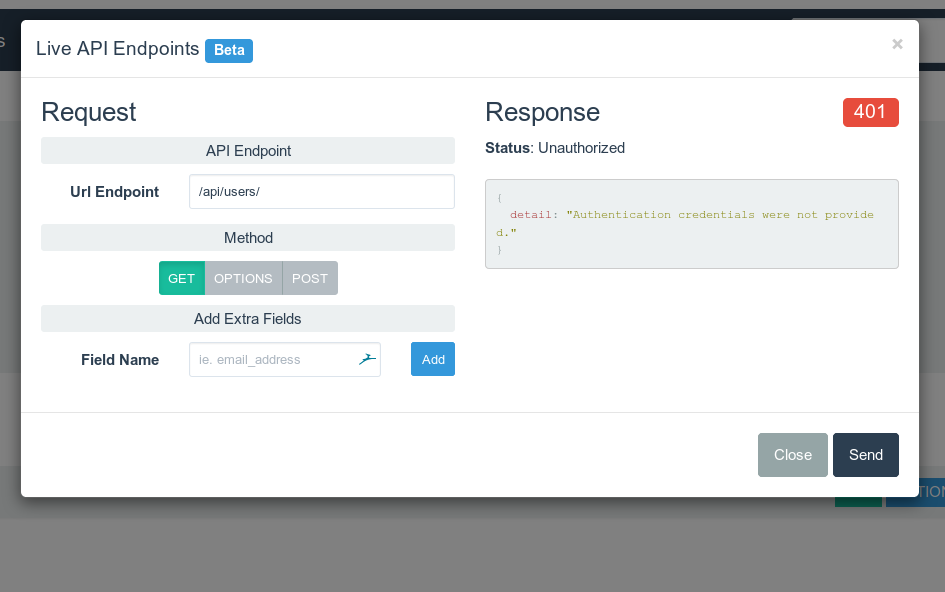
Well done ! At this point the API is protected and can't be access anymore publicly.
So now to be authenticated, we need to provide a token to the API. To get a token, we need to call a specific endpoint and give it our credentials. The endpoint url is the one we added in our urls.py file. Here is the http call using cUrl (you can use postman too
curl -X POST \
  https://app-b86ed9a3-cfa5-4d79-a572-890b5a4e545f.cleverapps.io/o/token/ \
  -H 'Content-Type: application/x-www-form-urlencoded' \
  -H 'Postman-Token: 059a3664-2e02-48d6-ba47-e19cc41f7b91' \
  -H 'cache-control: no-cache' \
  -d 'grant_type=password&username=yourusername&password=yourpassword&client_id=VbXH6Jwp7FSMqgL9fuXn3Qo6dI57BEYH1FGEMQPF&client_secret=Vur9PaOf39LaWEWxIAitTUrvbQOCDegCUpwCPCmKqcbZDz5FhbTKfYeI0IUBFvY4g3hxf4CctEWzw2KJrOfEsAVTDQ2z4LPImoRoGxyzZMmulswIwNLJHRIK8JIfTD93'
or using Postman
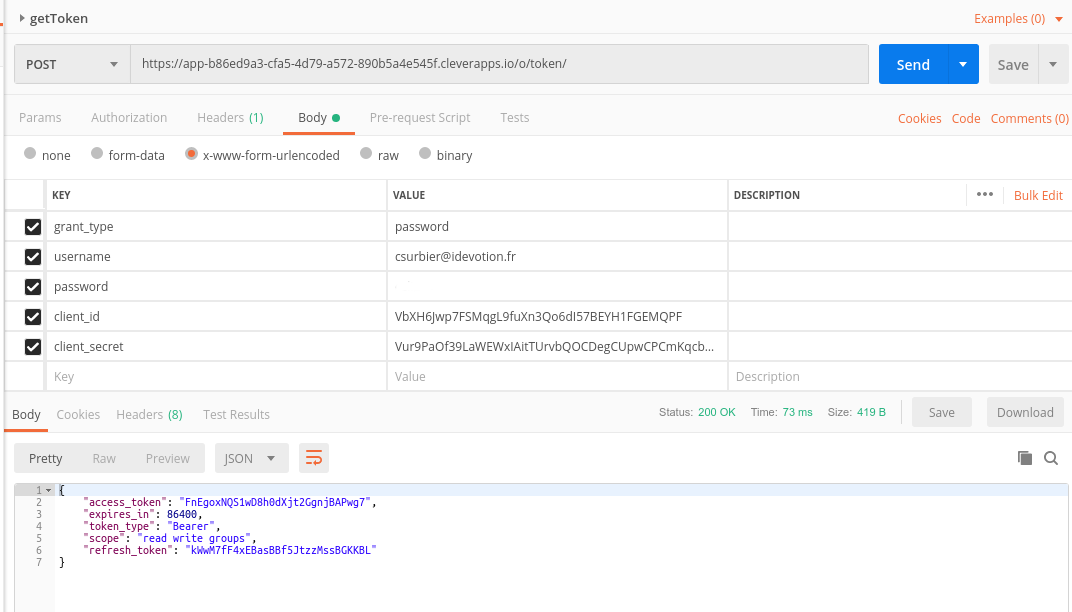
You just need to pass as parameters: your username, password, the client_id, client_secret and grant_type with value password. If everything is ok, you should obtain a token in the Http response body as you can see in the screenshot. I forget to mention but you need to specify some settings regarding the oAuth toolkit in your settings.py file:
#oAuth2 expiration
OAUTH_ACCESS_TOKEN_MODEL = 'oauth2_provider.models.AccessToken'
OAUTH2_PROVIDER = {
    'ACCESS_TOKEN_EXPIRE_SECONDS' : 86400,
    'SCOPES': {'read': 'Read scope', 'write': 'Write scope', 'groups': 'Access to your groups'}
}
One of the parameter is the ACCESS TOKEN expiricy (in seconds). In this configuration, after one day (86400 seconds) the tokens generated will not be valid and you will need to get a new one.
Now using the token we received we can authenticate ourselves and call the API: 
To do so, we need to specify in the Http headers of our request, the following:
Authorization: Bearer FnEgoxNQS1wD8h0dXjt2GgnjBAPwg7
We are using the value of the token received : FnEgoxNQS1wD8h0dXjt2GgnjBAPwg7.
Et voilà, we can now access again our API to get datas.
Please notice that at this point, you will not be able to use the Live Endpoint API tool, that we installed in the documentation, since there is no way to add specific headers in this tool.