- Share on
Implement Sign in with Apple in Ionic 4 application
October 2019
Please notice this is an advanced tutorial, and you should be already comfortable with Ionic and Django.
UPDATE: a new tutorial is now available to explain how to use the native API to sign in with Apple tutorial
If you have implemented the Facebook login or Google login in your application, you should also offer the possibility for your users to login with Apple (which is a new feature introduced with iOS 13), or Apple will reject your application.
So in this tutorial, i will show you how to implement this new sign in with Apple feature, using Ionic 4 and Django for backend.
Configure your Apple developer account for Apple Sign in using web method
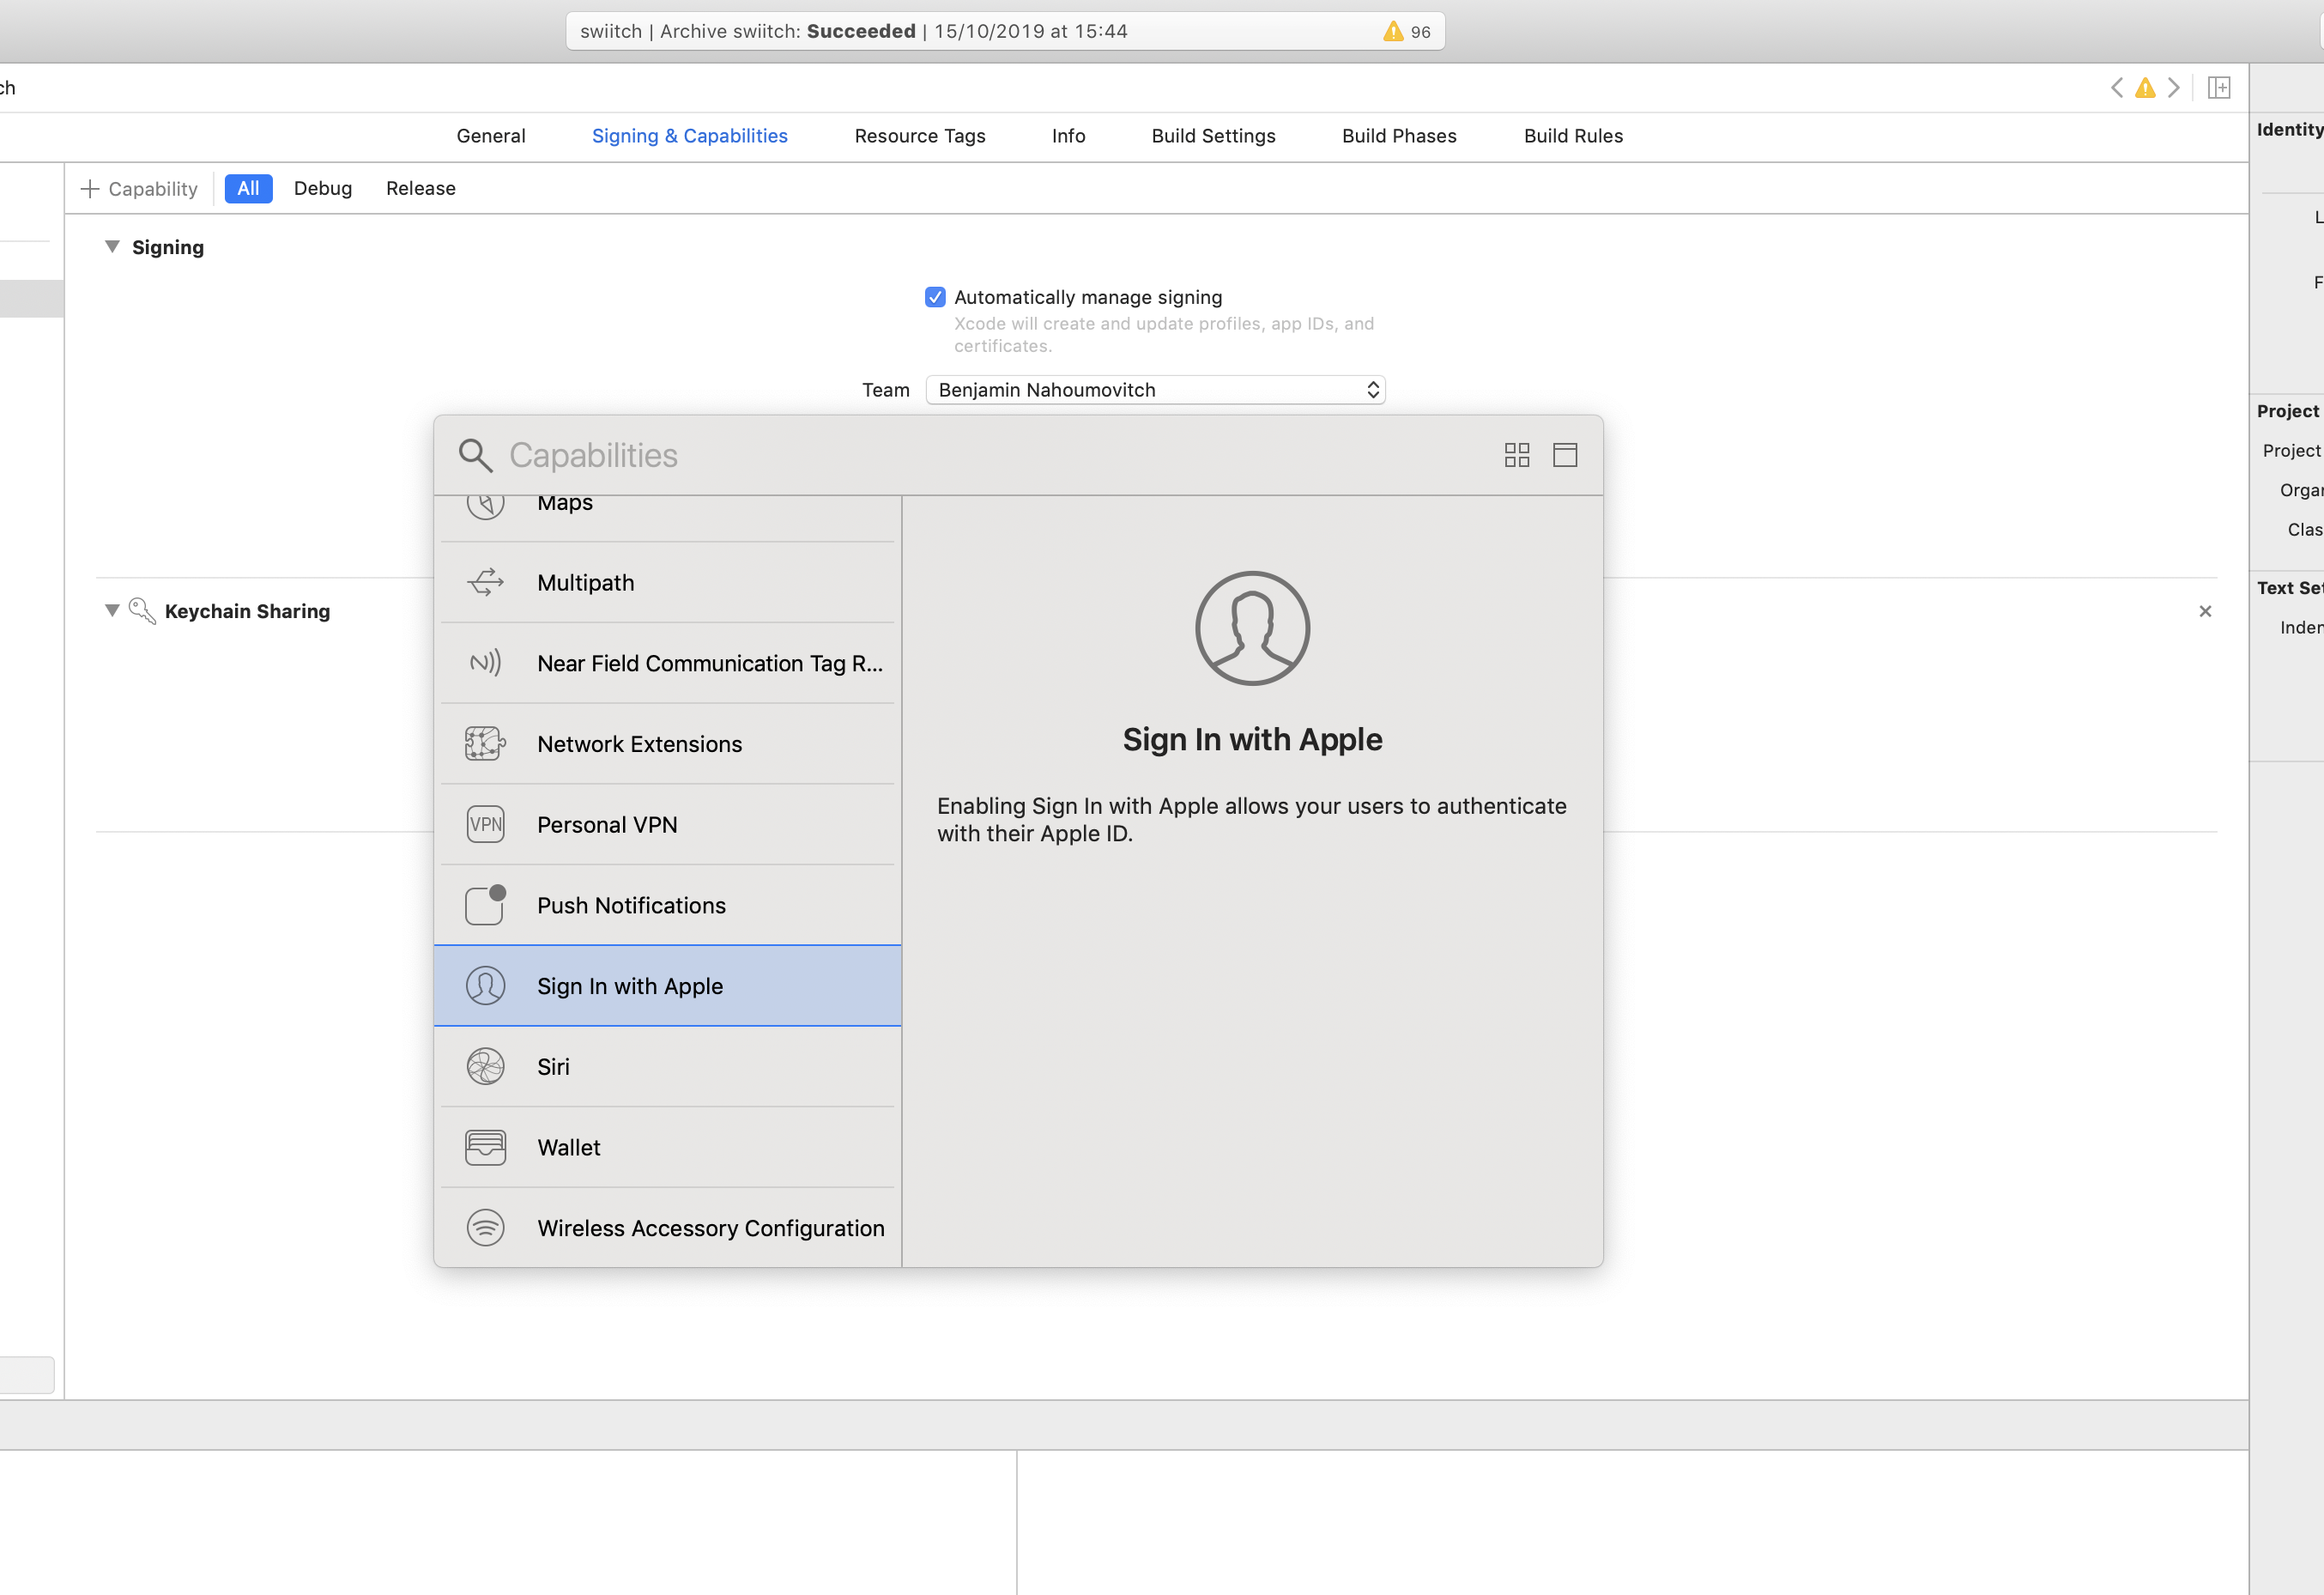
As first step, we will need to add the Signin feature to our iOS app. To do this, you need to open your app with xcode, then click on the Signing & capabilities tab, and check the "Sign In with Apple" feature.
Now next step is to configure our website on which will enable Apple to send the user identification once he will sign in in our app.
Indeed since we want to enable the "signin with apple" on our Ionic app (process will be the same on a website or a PWA), we will use the following instructions from Apple, and we need to configure few things in our developer apple account.
- Create a service id for our website
- Register a service id for our website
- Configure our website services id
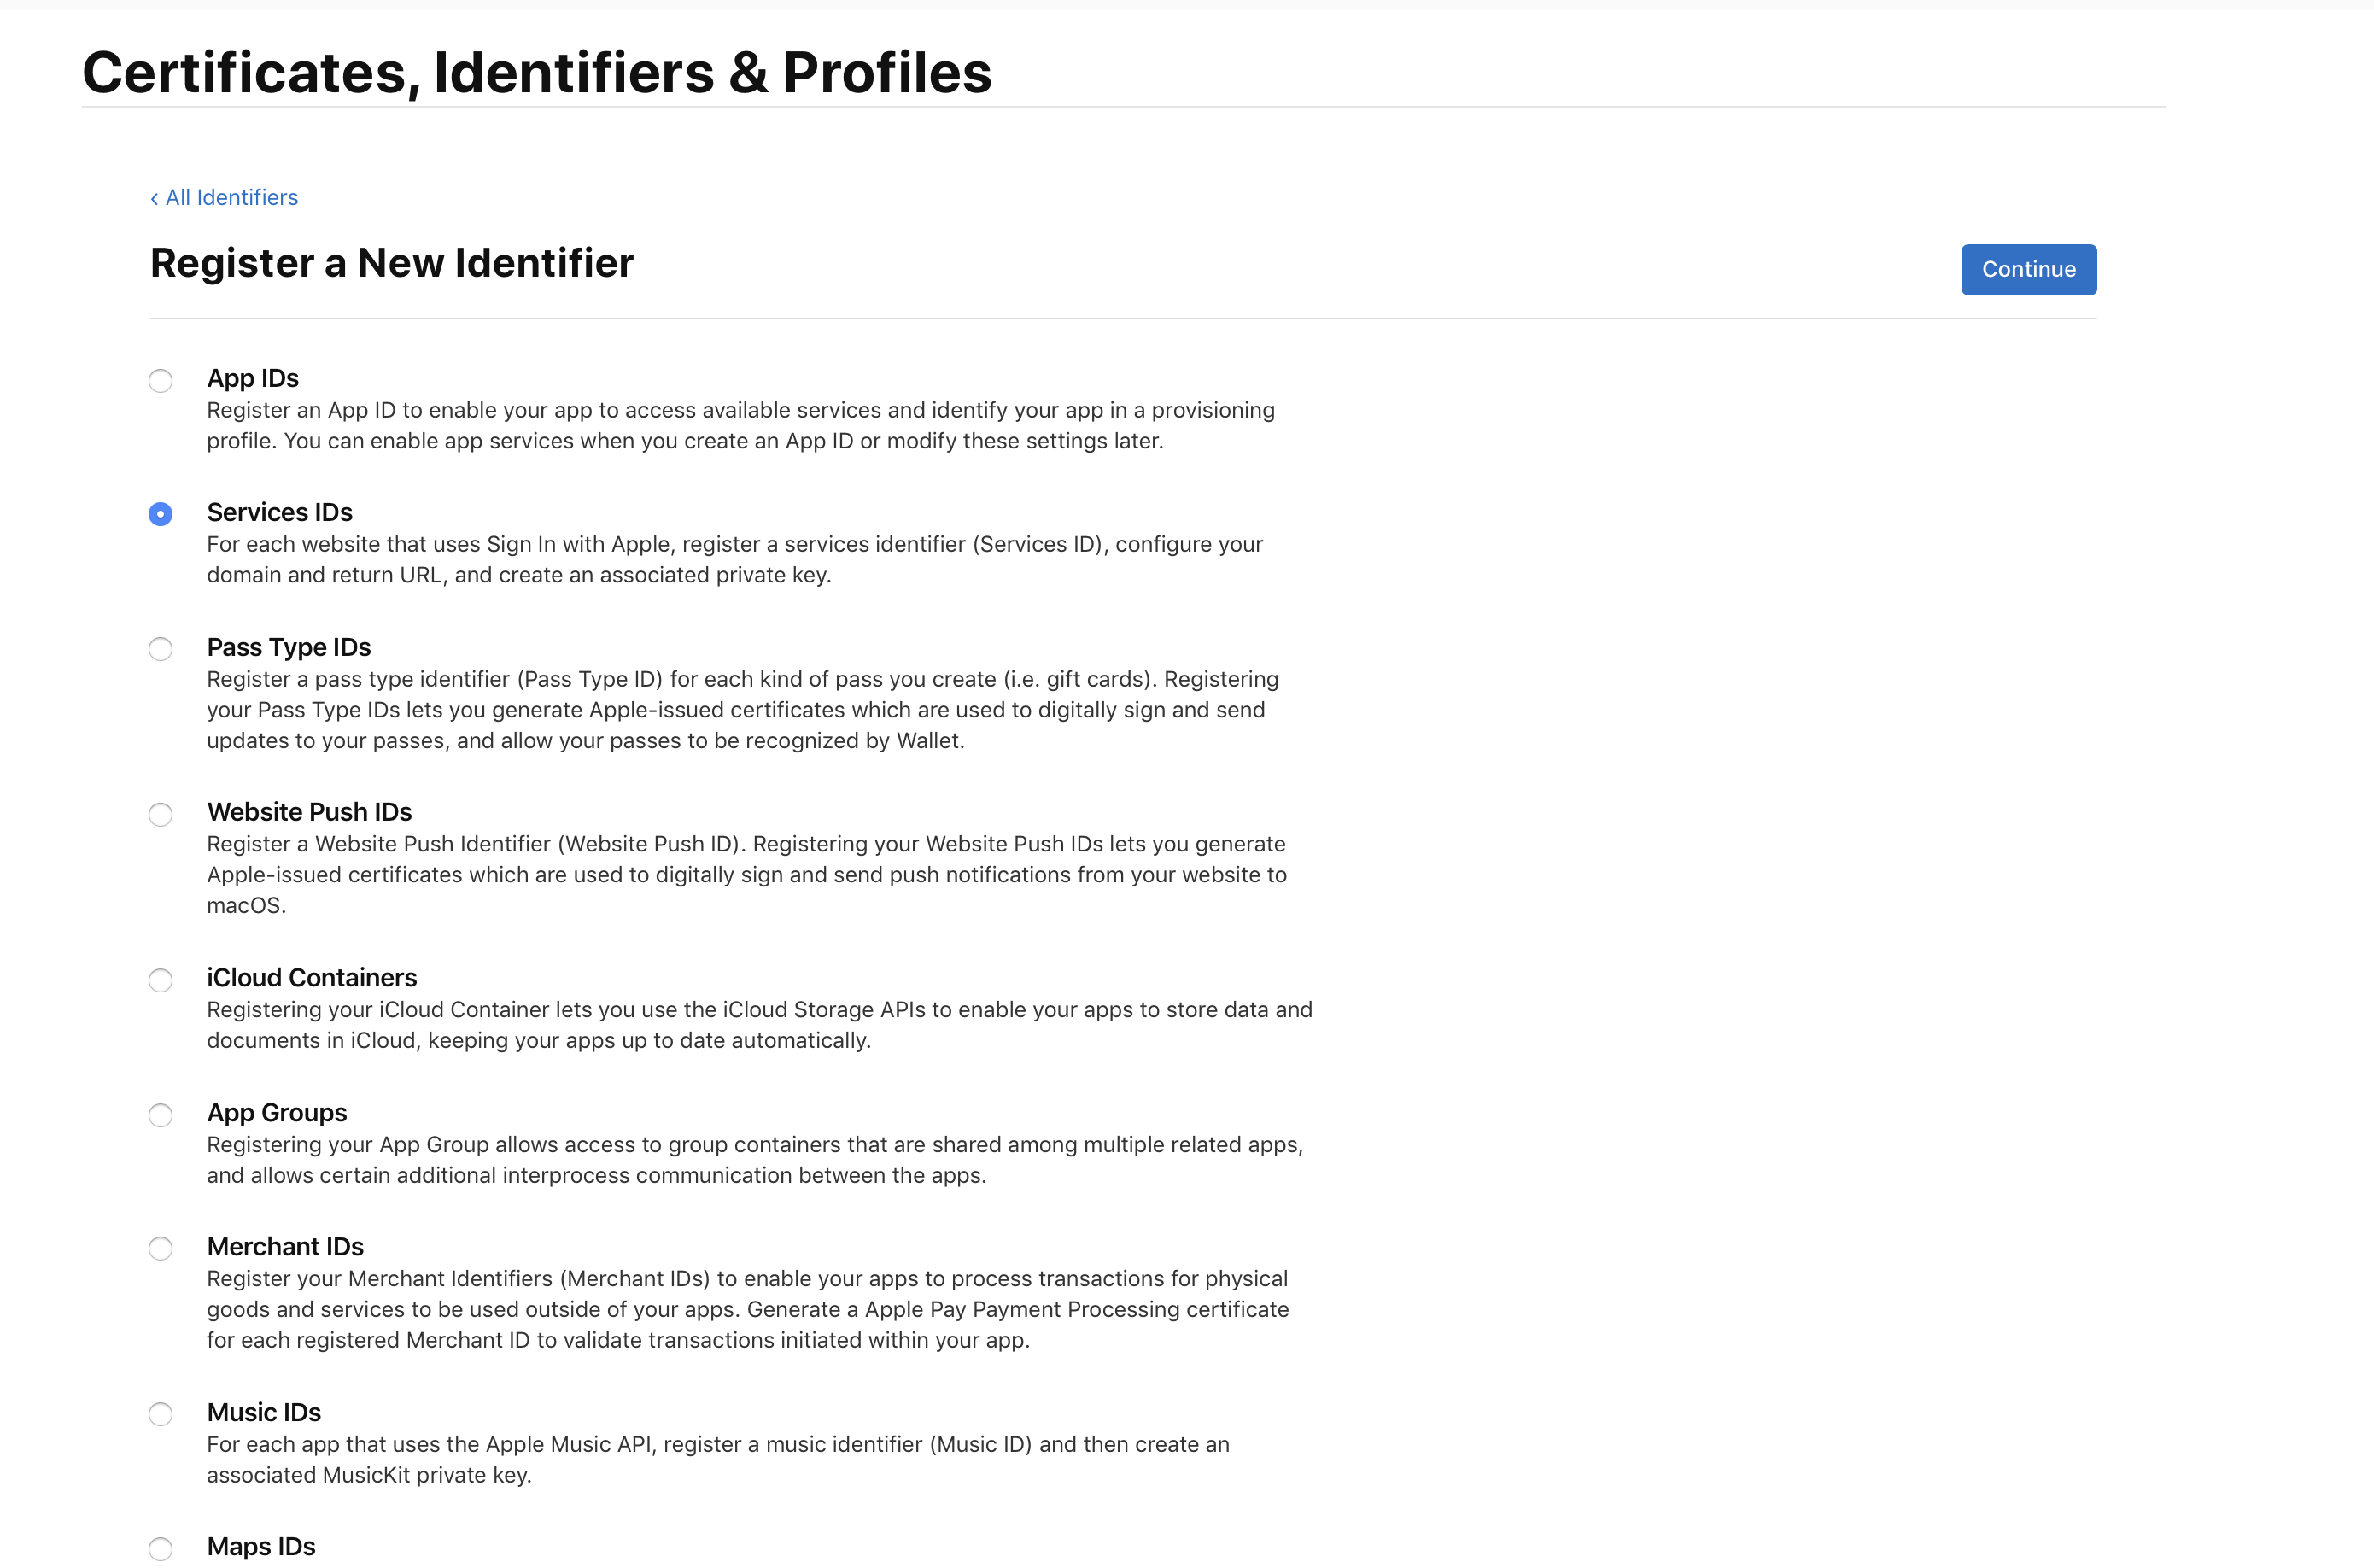
On your apple developer account, go to Certificates, identifier & profiles menu, and click on the plus button to add a new identifier. Then select the Services IDs option.
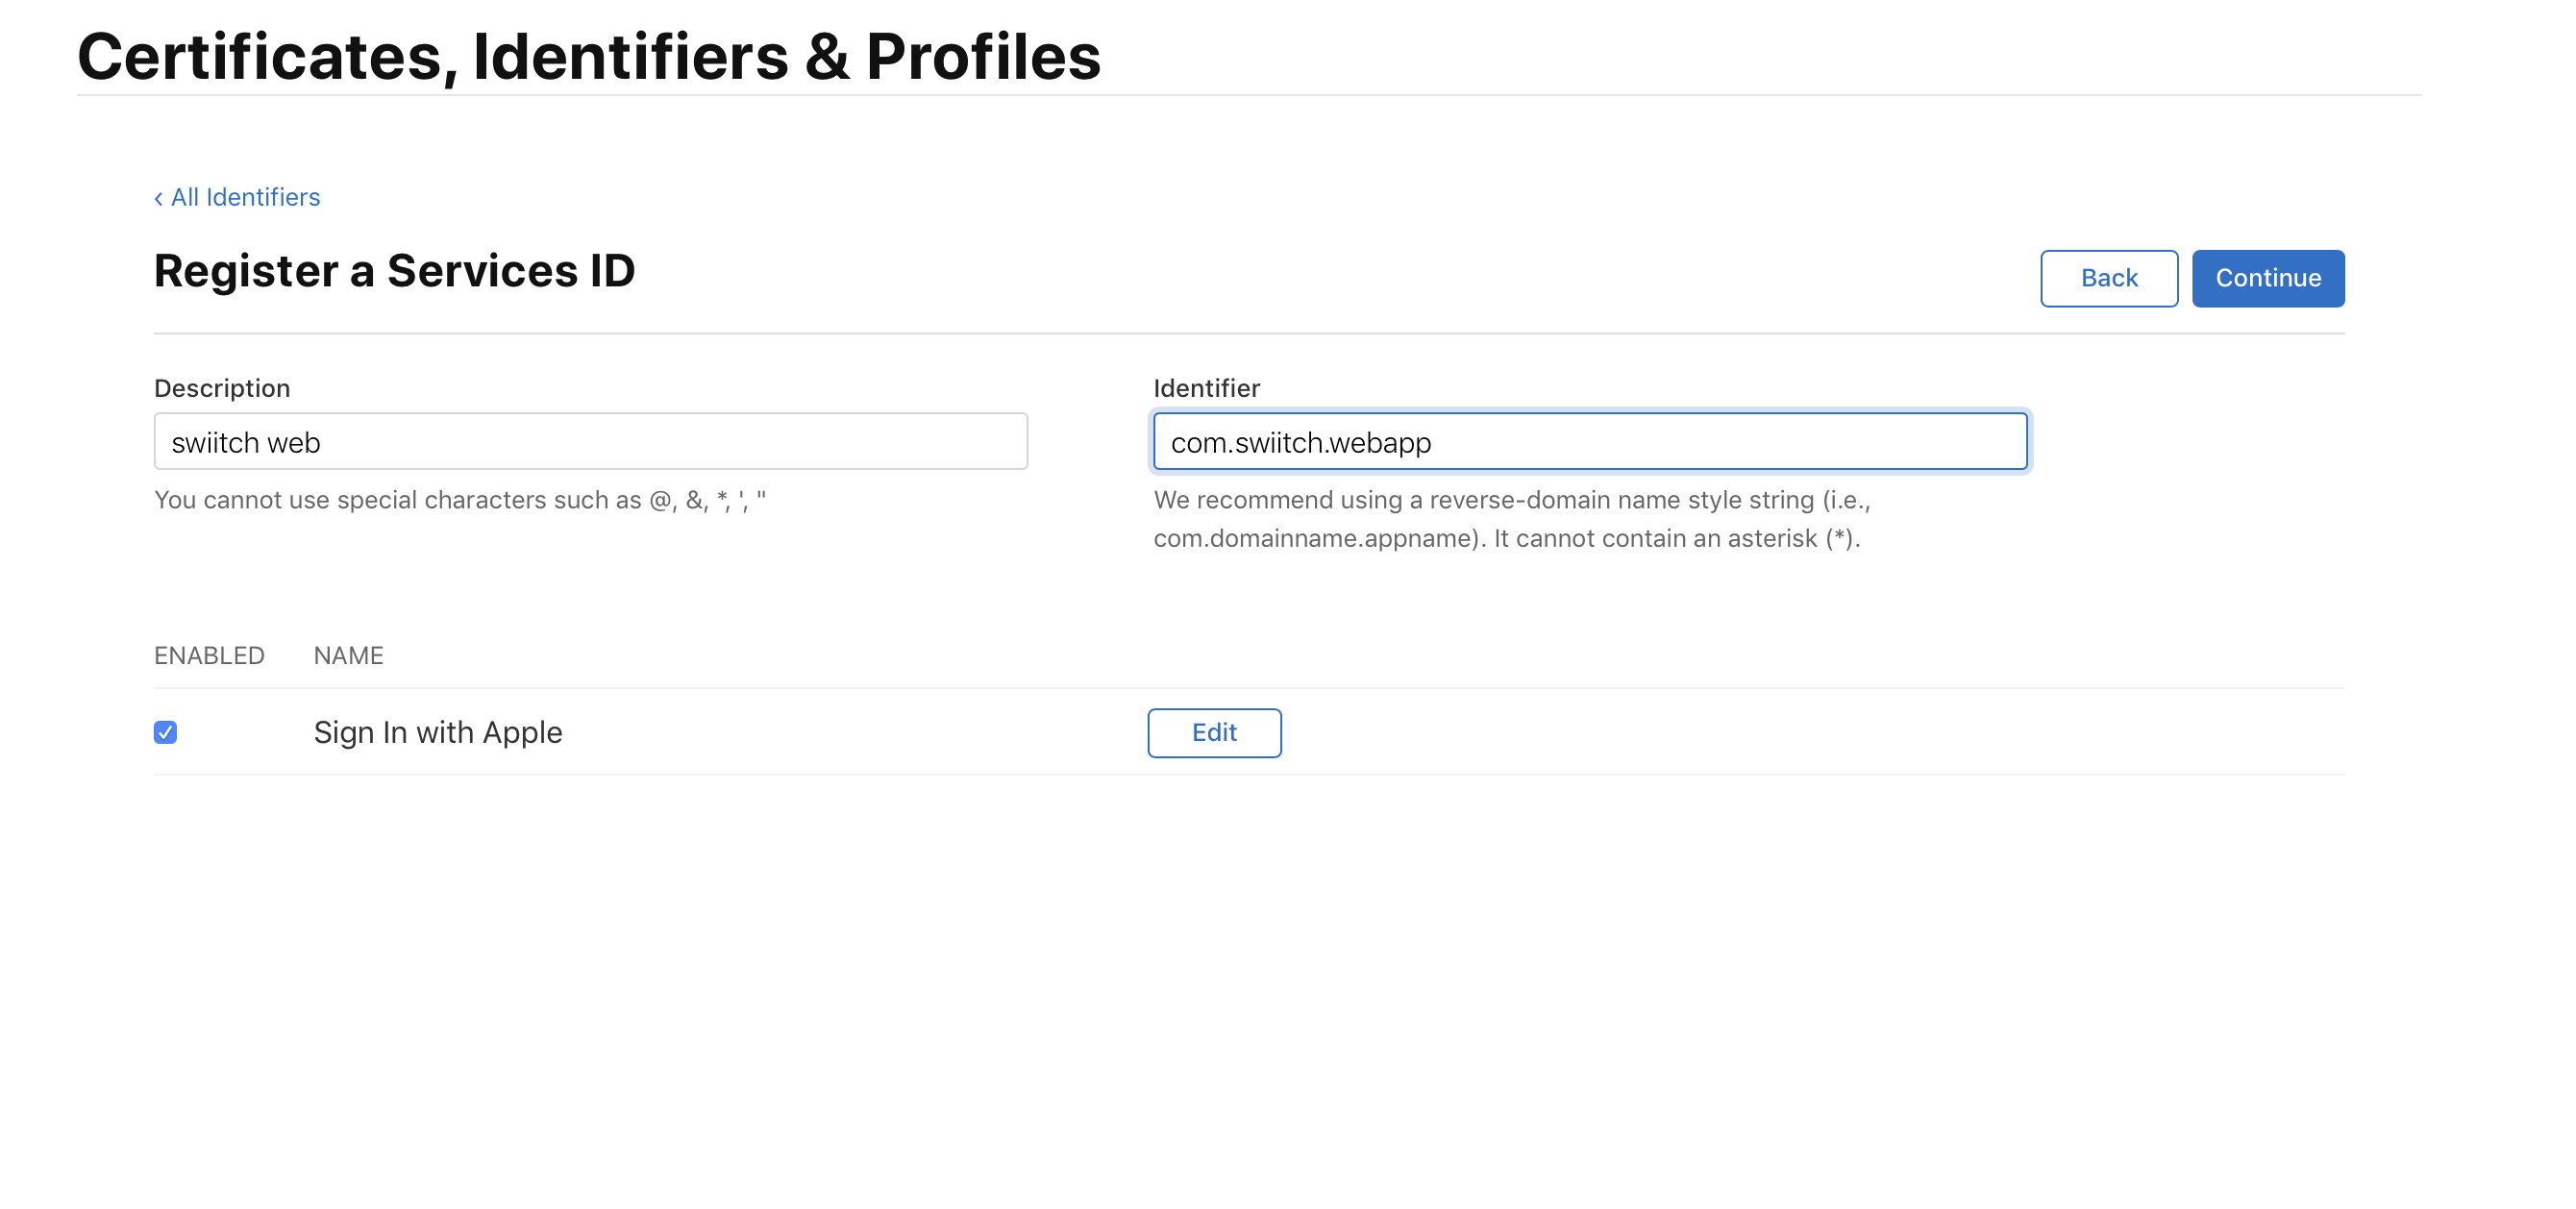
To register a new services id, we need to enter a description and an identifier. This identifier must be different than the one you choose for your ios app (usually known as bundle id). So i choose to add the word web in my identifier, which gives me the value: com.swiitch.webapp, while my ios app bundle id is : com.swiitch.app.
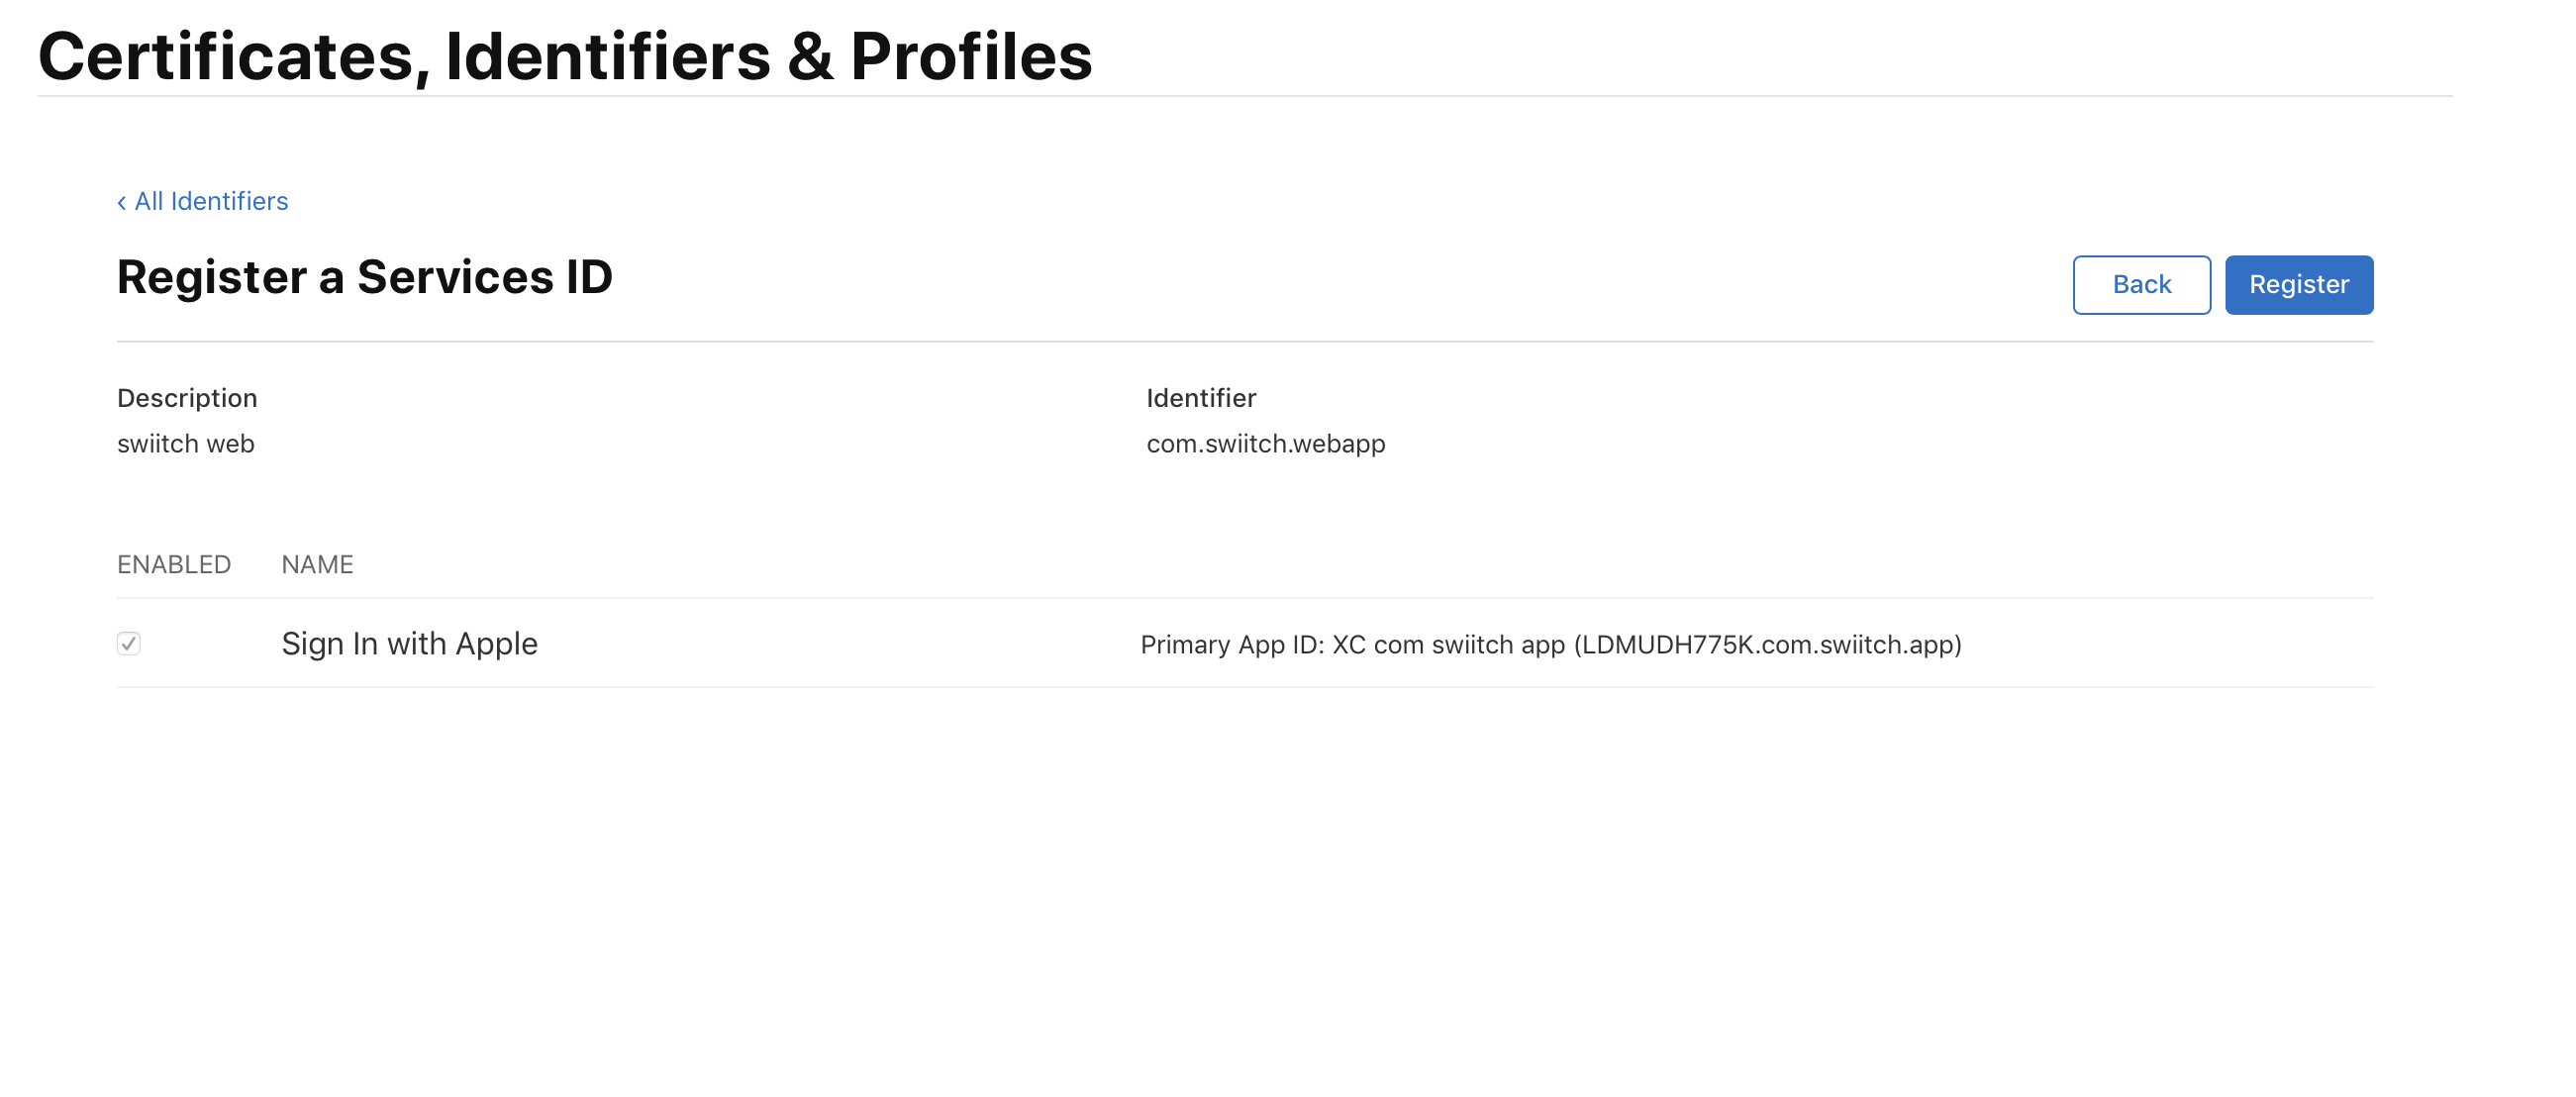
We also need to enable the "sign in with apple" and edit it to configure it.
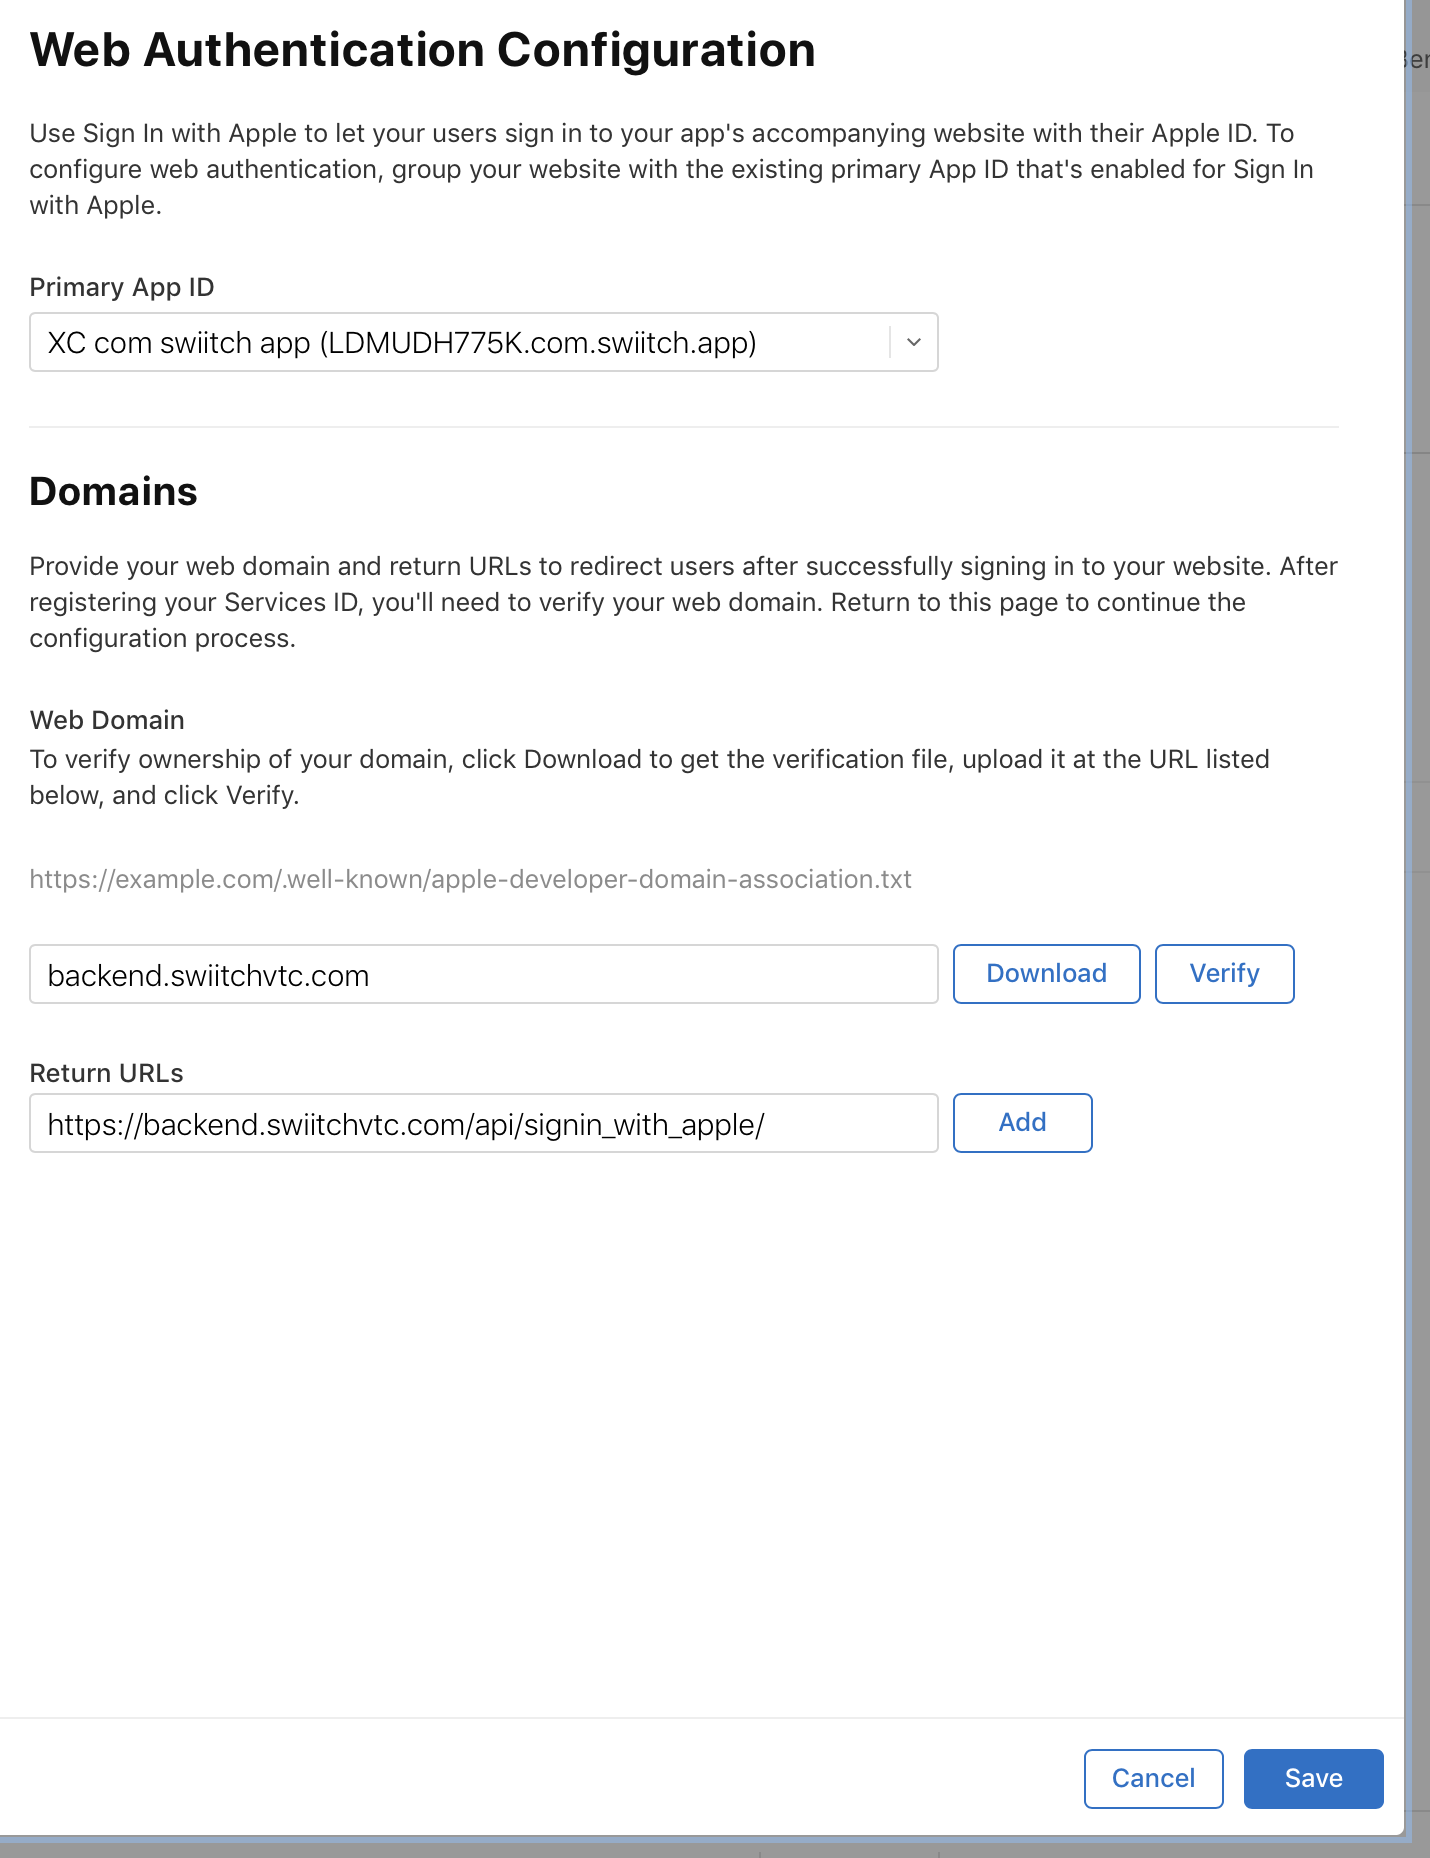
Last step is to provide the domain of your website (which will receive the user authentication) and the redirect_url (which will be called by Apple to send values).
The web domain will be our django backend (backend.swiitchvtc.com for this example) and the return URLS will be the endpoint name in our django backend that will receive the parameters sent by Apple (https://backend.swiitchvtc.com/api/signin_with_apple/ for this example, but you can name it as you want).

After clicking on "save" button, you can click on the register button and you are done for the configuration.
Configure our Django backend for Apple sign in
In previous step, we configure our website to receive the user authentification information. As i said, we don't have a real website, but just a django backend, which will receive the information to the specific endpoint we configured in previous step.
But before receiving information, our domain name must have been valided by Apple. To do so, we need to upload a verification file into it. To get this verification file, just go back to the configuration of the website and click on the "download" button.
As mentionned, Apple will try to verify our domain by calling the url:https://example.com/.well-known/apple-developer-domain-association.txt which means for our domain: https://backend.swiitchvtc.com/.well-known/apple-developer-domain-association.txt
So i will configure this specific url in our Django backend. Just edit the urls.py file of my django project and add the following code:
from django.views.generic.base import RedirectView
from django.contrib.staticfiles.storage import staticfiles_storage
urlpatterns = [
    path(".well-known/apple-developer-domain-association.txt", RedirectView.as_view(url=staticfiles_storage.url("apple-developer-domain-association.txt")), ),
I'm declaring the path .well-known/apple-developer-domain-association.txt as a valid url, and tell Django to use the default method RedirectView.as_view and giving it the name of the file i want to redirect to. This file apple-developer-domain-association.txt is the one downloaded from Apple, and i put it in my django project static files.
Now if i redeploy the django project and click the "Verify" button (on Apple website), Apple should be able to verify our domain. You can check yourself before if the url responds successfully.
Receive "Sign in with Apple" user information with Django
If you have read the apple's instruction, you already know that Apple will pass us the following parameters:
| code | A single-use authorization code that is valid for five minutes. |
| id_token | A JSON web token containing the user’s identity information. |
| state | The state contained in the Authorize URL |
| user | A JSON string containing the data requested in the scope property. The returned data is in the following format: { "name": { "firstName": string, "lastName": string }, "email": string } |
The code will be useless for us.
The id_token will be the unique identifier for our user (such as a facebookId or googleId)
The state will be the same value that the one we passed to Apple (we will discuss about it later in the Ionic implementation). This is based on this value that we can retrieve the content in our backend.
The user information will contains the email and firstName, lastName
So we need to save all these values in our database, to be able to retrieve all of these information later in our Ionic application. To do so, i will create a new specific django models.
class AppleSignIn(models.Model):
    id = models.UUIDField(primary_key=True, default=uuid.uuid4, editable=False)
    code = models.TextField(null=True, blank=True)
    token = models.TextField(null=True, blank=True)
    state = models.CharField(max_length=100,null=True,blank=True)
    jsonUser = models.TextField(null=True,blank=True)
    createdDate = models.DateTimeField(auto_now_add=True)
    updatedDate = models.DateTimeField(auto_now=True)
    def __str__(self):
        return u'%s - %s' % (self.code,self.state)
Then we can implement our endpoint url (the one we specified in the Redirect's url of Apple configuration).
Edit the api/urls.py file of your api and add:
url(r'^signin_with_apple/$',
            signinApple,name="signinApple"),
We just define our new endpoint and told django to use the signinApple method, so let's implement it:
@csrf_exempt
def signinApple(request):
    logger.info("==== Sign in with Apple")
    if request.method == "POST":
        try:
            code = request.POST['code']
            id_token = request.POST["id_token"]
            state = request.POST["state"]
            if "user" in request.POST:
                user = request.POST["user"]
                logger.info("Code %s id_token %s state %s user %s"%(code,id_token,state,user))
                from bo.models import AppleSignIn
                signin = AppleSignIn()
                signin.code=code
                signin.token = id_token
                signin.state = state
                signin.jsonUser = user
                signin.save()
            else:
                from bo.models import AppleSignIn
                signin = AppleSignIn()
                signin.code = code
                signin.token = id_token
                signin.state = state
                signin.jsonUser = ""
                signin.save()
            html = "<html><body><h1>Merci vous pouvez retourner sur l'application Swiitch</h1></body></html>"
            return HttpResponse(html)
            #return HttpResponse(status=200)
        except Exception as e:
            logger.info(e)
            return HttpResponse(status=500)
    return HttpResponse(status=404)
The code is quite simple. We get the parameters sent by Apple within a POST method.
Please notice that when we are signin with Apple for the first time, Apple will sent the user information into the user parameter, but then on next time, the user can be empty or missing
We save the received values in our new AppleSignIn models and we return an html response telling our enduser to go back to the Ionic application.
In didn't mentionned it yet, but when sign in with Apple in our Ionic application, we will launch an external Safari to a specific url to do the authentification. So our user will be redirected outside of our Ionic app. This is why as an html response, i display a message in Safari, to ask the user to go back to the Ionic application.
Finally we need to add a new endpoint to our api, to be able to retrieve the received values using the state parameters. This time, we will use default django rest framework method, to do this:
url(r'^applesignin/$',
            AppleSignInListView.as_view(),
            name='applesignin'),
And we will declare this method:
class AppleSignInFilter(FilterSet):
    class Meta:
        model = AppleSignIn
        fields = [
            'state',
            ]
class AppleSignInListView(generics.ListAPIView):
    """
            get:
                Permet de rechercher (ou de voir) les apple sign in existants.
                Il est possible de rechercher via le champs:
                :param state: state
    """
    permission_classes = [permissions.IsAuthenticated]
    queryset = AppleSignIn.objects.all()
    serializer_class = AppleSignInSerializer
    # How to filter
    filter_class = AppleSignInFilter
    ordering = ('-createdDate',)
and the associated serializer:
class AppleSignInSerializer(serializers.ModelSerializer):
    class Meta:
        model = AppleSignIn
        fields = '__all__'
Ok so using this endpoint /applesignin we will be able to search a specific value using the state parameter (since we add a filter on it).
Now it's time to implement sign in with Apple into our Ionic application.