- Share on
Create an Apple Signin plugin with Capacitor to use within a Ionic application
January 2020In a previous tutorial we learned how to implement the Apple signin within a Ionic application, and we saw that to have a successful working worflow, we needed to launch an external browser from our application. And once the signin done, we asked the user (in a web page) to go back to the application.
As a better solution, we will implement a native Apple Signin workflow by developping a native plugin with Capacitor.
Introducing Capacitor with Ionic
Capacitor provides a native mobile runtime and API layer for web apps. It's an open source project, develop and maintain by the Ionic framework team.
Unlike Cordova, Capacitor exposes API that will work both on native devices (ios/android) and web, by using native components or HTML5 technologies under the wood.
So, using Capacitor makes it easy to ship a PWA version of your iOS and Android app store apps with minimal work.
Another big difference with Cordova, is that Capacitor generates the native project (meaning xcode project and android project) once, but then you will have to use the native IDE (xcode or android studio) to build and distribute your app.
Capacitor just build your javascript/assets folder (usually www directory) and copy it into your native project. It's up to you to configure your native project.
Capacitor requires you to be more involved in the native project configuration than with Cordova. They claim this is the right approach, because it makes it easy to follow existing Native iOS/Android guides, get help on Stack Overflow, and have full control over your project.
Create Ionic project with capacitor included
For this tutorial, we will start with a new ionic project and specify that we want to include capacitor with the --capacitor option.
ionic start demoAppleSignIn blank --capacitor --type=angularIn our newly generated ionic project, we will edit the home.page.html file and add our Apple signin button
<ion-header>
  <ion-toolbar>
    <ion-title>
      Signin with Apple demo
    </ion-title>
  </ion-toolbar>
</ion-header>
<ion-content>
  <div class="buttons">
    <ion-button mode="md" expand="block" color="dark" (click)="doAppleLogin()">
      <ion-icon slot="start" class="sw-Apple"></ion-icon> Sign in with Apple
    </ion-button>
  </div>
</ion-content>
In our home.page.ts we will define the doAppleLogin() method, which will be empty right now
 doAppleLogin(){
  }
Create capacitor plugin
Before creating a capacitor plugin, we need to have some dependencies installed. If you already have this tools installed, you can skip the next steps.
First we need to install cocoapods
sudo gem install cocoapodsThen we need xcode tools
xcode-select --installOk so now we can create our capacitor plugin with the following command:
npx @capacitor/cli plugin:generate
WARNING: You must create the source code of your plugin outside your ionic project
And we will answer some questions:
✏️  Creating new Capacitor plugin
? Plugin NPM name (snake-case): applesigninplugin
? Plugin id (domain-style syntax. ex: com.example.plugin) com.idevotion.applesignindemo
? Plugin class name (ex: AwesomePlugin) AppleSignInPlugIn
? description:  A plugin to manage Apple signin workflow
? git repository: https://github.com/csurbier/applesignincapacitorplugin.git
? author: csurbier
? license: MIT
? package.json will be created, do you want to continue? Yes
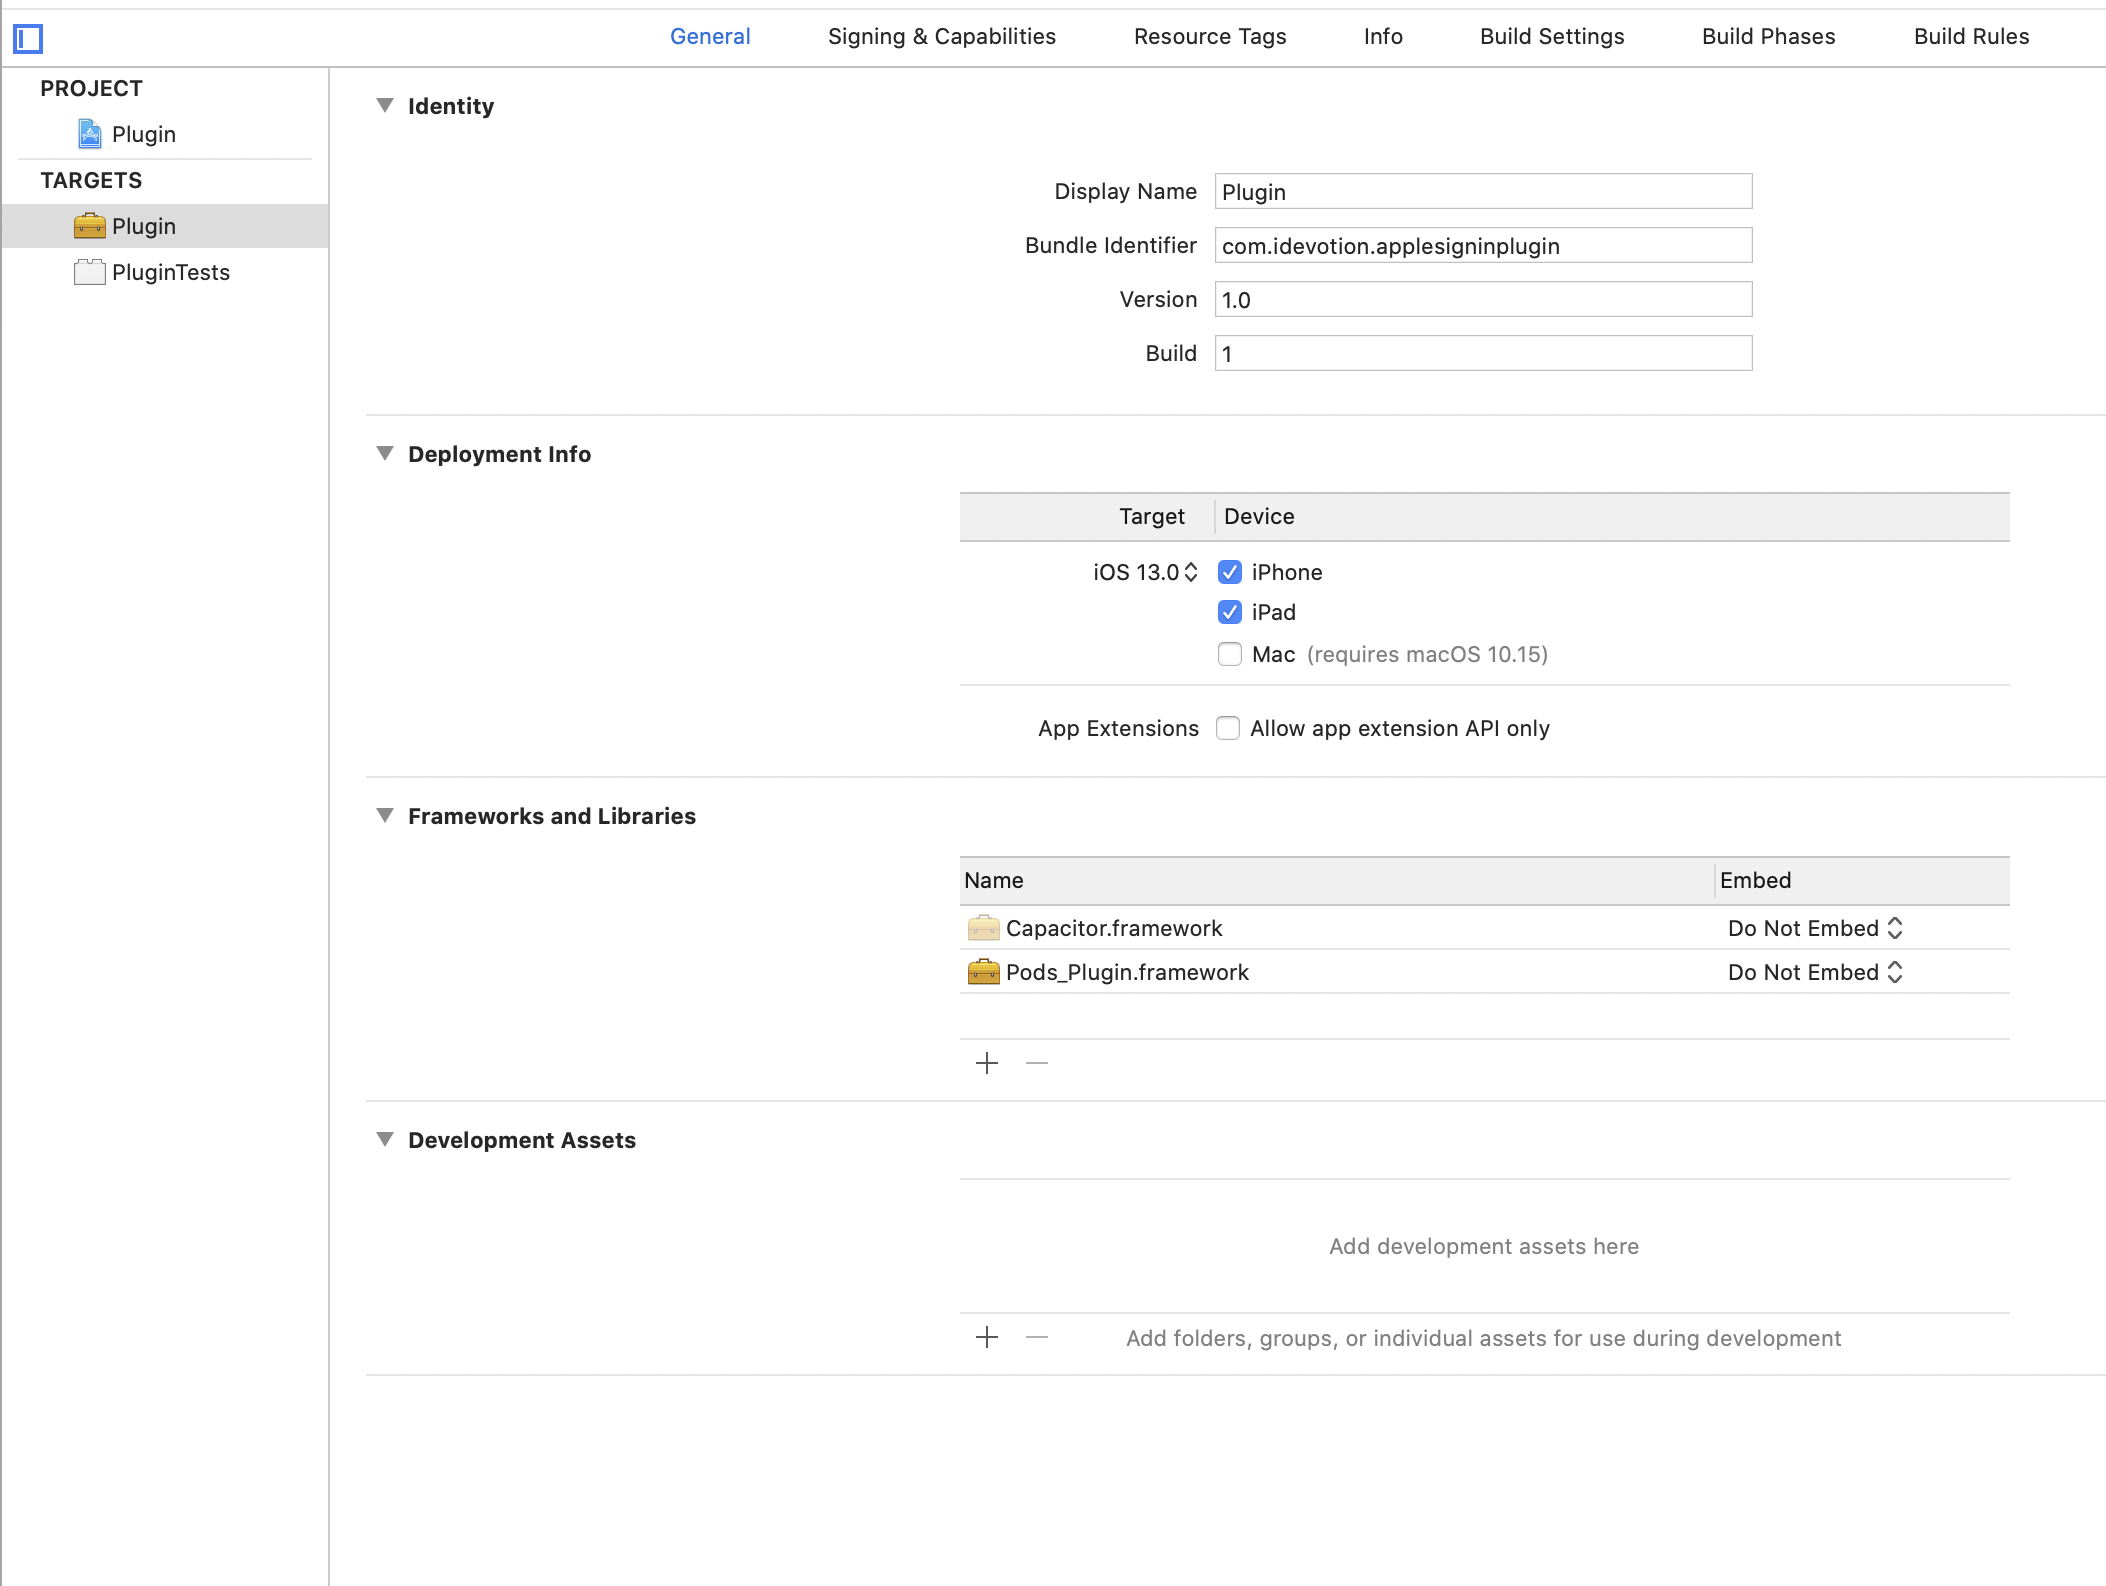
Capacitor generates our plugin structure, so now we can open our AppleSignInPlugIn/ios/Plugin.xcworkspace in Xcode.
Since Apple Signin is available only starting with iOS 13, we will update our project configuration to set ios 13 minimum requirement otherwise we will not be able to compile the project
Now we need to edit the auto generated Plugin.swift file and write our native code to manage the Apple SignIn.
You need to have knowledge of Swift langage and iOS development to do so. This is not the goal of this tutorial to explain that part.
import Foundation
import Capacitor
import AuthenticationServices
class GetAppleSignInHandler: NSObject, ASAuthorizationControllerDelegate {
  typealias JSObject = [String:Any]
  var call: CAPPluginCall
  var identityTokenString :String?
    var window : UIWindow;
    init(call: CAPPluginCall,window:UIWindow) {
    self.call = call
    self.window = window
    super.init()
    let appleIDProvider = ASAuthorizationAppleIDProvider()
    let request = appleIDProvider.createRequest()
    request.requestedScopes = [.fullName, .email]
    let authorizationController = ASAuthorizationController(authorizationRequests: [request])
    authorizationController.delegate = self
    authorizationController.presentationContextProvider = self
    authorizationController.performRequests()
}
    func authorizationController(controller: ASAuthorizationController, didCompleteWithError error: Error) {
         // error.localizedDescription
         //  print("Error - \(error.localizedDescription)")
        call.error(error.localizedDescription, error, [
             "message": error.localizedDescription
           ])
      }
      func authorizationController(controller: ASAuthorizationController, didCompleteWithAuthorization authorization: ASAuthorization) {
          if let appleIDCredential = authorization.credential as? ASAuthorizationAppleIDCredential {
             // print("User Id - \(appleIDCredential.user)")
             // print("User Name - \(appleIDCredential.fullName?.description ?? "N/A")")
             // print("User Email - \(appleIDCredential.email ?? "N/A")")
             // print("Real User Status - \(appleIDCredential.realUserStatus.rawValue)")
              if let identityTokenData = appleIDCredential.identityToken,
                  let theIdentityTokenString = String(data: identityTokenData, encoding: .utf8) {
               //   print("Identity Token \(theIdentityTokenString)")
                  self.identityTokenString = theIdentityTokenString
              }
            var ret = JSObject()
            ret["user"] = appleIDCredential.user
            ret["fullName"] = appleIDCredential.fullName?.description ?? "N/A"
            ret["email"] = appleIDCredential.email ?? "N/A"
            ret["realUserStatus"] = appleIDCredential.realUserStatus.rawValue
            ret["identityTokenString"] = self.identityTokenString as Any
            call.success(ret)
          } else if let passwordCredential = authorization.credential as? ASPasswordCredential {
              // Sign in using an existing iCloud Keychain credential.
              let username = passwordCredential.user
              let password = passwordCredential.password
             var ret = JSObject()
                      ret["username"] = username
                      ret["password"] = password
             call.success(ret)
          }
      }
}
/**
 * Please read the Capacitor iOS Plugin Development Guide
 * here: https://capacitor.ionicframework.com/docs/plugins/ios
 */
@objc(IDAppleSignInPlugIn)
public class IDAppleSignInPlugIn: CAPPlugin {
    var signInHandler: GetAppleSignInHandler?
    @objc func echo(_ call: CAPPluginCall) {
          let value = call.getString("value") ?? ""
          call.success([
              "value": value
          ])
      }
    @objc func doAppleLogin(_ call: CAPPluginCall) {
      call.save()
        DispatchQueue.main.async {
            self.signInHandler = GetAppleSignInHandler(call: call, window: (self.bridge?.getWebView()?.window)!)
        }
  }
}
extension GetAppleSignInHandler: ASAuthorizationControllerPresentationContextProviding {
    public func presentationAnchor(for controller: ASAuthorizationController) -> ASPresentationAnchor {
        return self.window
  }
}
Once our Plugin Swift code is ready we can publish it on npmsjs.com
npm publish
Ok now it's time to use it inside our Ionic project.
First we need to install it:
npm install id-applesigninplugin Then update our code in Ionic to use our Plugin. When clicking on the Apple SignIn button, we want to call our native method that will trigger the native workflow for Apple SignIn and then which will send back to ionic the results
import { Component } from '@angular/core';
import { Plugins } from "@capacitor/core";
const { IDAppleSignInPlugIn } = Plugins
@Component({
  selector: 'app-home',
  templateUrl: 'home.page.html',
  styleUrls: ['home.page.scss'],
})
export class HomePage {
  signin: null ;
  constructor() {}
    doAppleLogin(){
     IDAppleSignInPlugIn.doAppleLogin().then((info)=>{
      if (info){
        console.log("on a info ")
        console.log(info)
        let identityTokenString = info["identityTokenString"]
        if (identityTokenString){
          console.log("on recoit "+identityTokenString)
        }
      }
      else{
        console.log("Pas de info")
      }
     })
  }
}
Now we can build our Ionic project
ionic buildAnd finally update our capacitor and ios project to test the workflow inside the iOS simulator or on a real device.
npx cap sync ios
npx cap open ios
If you want to kickoff your Ionic and Django project in few minutes, don't hesitate to visit my new website  Ionic And Django Kickoff