
Create a chat application with Ionic 5/ Angular 12/ Capacitor 3 and Django 3 – Series – Part seven
In previous tutorials, we learned how to register or login a user, to redirect to an home page and to protect the application using Angular guards.
However we made all our tests using a browser since Ionic can be used to build progressive web app application (running on the web).
Now we will learn how to use Capacitor to deploy our code on a real mobile device.
Day 7 : Deploy on simulator or mobile device
Capacitor, which is developped by the Ionic team, is the new tool to build native apps with Web technologies (such as Ionic). Before Capacitor the most used framework was Cordova but this is the past.
With Capacitor you can access and use native mobile code within your web application (using native Plugins and thru javascript). There are some official Capacitor plugins but there are also plugins created by the community, and it’s even possible to create it’s own plugin (if you know how to develop nativley for iOS or Android).
Use capacitor to build ios and android application
To iniatialize Capacitor with a Ionic project you can just type:
ionic integrations enable capacitorBut this is useless because since we started from a fresh Ionic project, we already configure our Ionic project to use Capacitor.
In tutorial 4, we created the project with the –capacitor option :
ionic start ChatTuto sidemenu –capacitor –project-id=chattuto –package-id=com.idevotion.chattuto
We also installed the iOS package with the command:
npm install @capacitor/iosNow let’s add the Android package:
npm install @capacitor/android@3.0.0When i started this tutorial, the Capacitor version was 3.0.0 so we need to specify this version, otherwise some conflict issues/error will occured because Capacitor has moved to version 3.1.1 when writing this tutorial 7.
If you want to update the full project with latest version of Capacitor it’s possible but quite annoying. You need to uninstall previous package (ios, android) or conflict will raise, then install latest version of plugins used (or conflict will raise) and install latest version of Capacitor client and core libraries.
Then you can install again ios and Android packages:
npm uninstall @capacitor/ios
npm uninstall @capacitor/android
npm install @capacitor/{network,splash-screen,status-bar,storage,keyboard,app,haptics}@latest
npm install @capacitor/cli@latest
npm install @capacitor/core@latest
npm install @capacitor/ios@latest
npm install @capacitor/android@latest
Then to generate the iOS and Android projects you can launch the command:
npx cap add ios
npx cap add android
Capacitor will create an ios directory in which you will find the iOS xcode project, and an android directory in which you will find the Android studio project.
To launch the desired project, just type:
npx cap open iosor
npx cap open androidAnd the desired IDE (Xcode or Android studio) will open.
Please notice that you need a Mac to do iOS developement.
Update Capacitor with latest Ionic code source
To build the application, launch the command:
ionic build --prodWhen building with –prod option, Ionic will make more verification on your code and do lot of optimizations to reduce the bundle size of your app. Sometimes some development error can occurs that didn’t happenned with ionic serve command.
As example, i had the error Property ‘submitAttempt’ does not exist on type ‘LoginPagePage’. which is true since i didn’t declare this variable in my code. I removed this parameter from my HTML page and build again to solve the issue.
Then if compilation is successfull, you can update your iOS/Android IDE with the latest code with the command:
npx cap copyor just specify the platform you want to update:
npx cap copy ios
npx cap copy android
If you install a new Capacitor library (we will see this soon), then you need to launch a
npx cap sync or
npx cap sync ios
npx cap sync android
The command is sync and not copy.
Running project in simulator or device
To run and test our application on a simulator or a device, we just need to open the desired IDE (Xcode or Android) and proceed as we will do with native development.
For iOS, i just launch Xcode
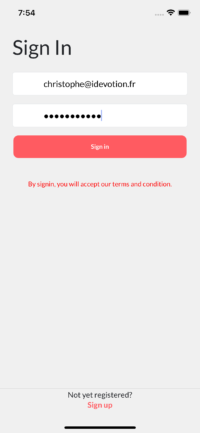
npx cap open iosthen select an iOS simulator and click the Run button. After compiling, the simulator launchs and i’m able to see the LoginPage of your application.
Everything is working perfectly, meaning you can login (or register) and see the HomePage
You can do the same with Android studio
Another command is also possible if you want to run the project without opening Xcode/Android studio. Just launch the command
npx cap run iosor
npx cap run androidAnd Capacitor will update project with your latest ionic code, and then will launch automatically Xcode or Android studio and will ask you on which device (or simulator) you want to run the application, before running it.
Generate application icons and splashscreen
When using Capacitor, the application icon and splashscreen will be the default Capacitor one. But of course, we can change it easily. To do that we need to create a resources directory into our Chattuto root folder:
mkdir resourcesAnd then inside this folder, we need to put 2 files:
- icon.png : should be an image of 1024*1024 pixels with your logo
- splash.png : should be an image of 2732*2732 pixels with your splashcreen
Then we will install a library to generate images:
npm install cordova-res --save-devThen create a scripts folder still inside our chattuto root folder:
mkdir scriptsand create a resources.js file with the following code:
const fs = require('fs');

const SOURCE_IOS_ICON = 'resources/ios/icon/';
const SOURCE_IOS_SPLASH = 'resources/ios/splash/';

const TARGET_IOS_ICON = 'ios/App/App/Assets.xcassets/AppIcon.appiconset/';
const TARGET_IOS_SPLASH = 'ios/App/App/Assets.xcassets/Splash.imageset/';

const SOURCE_ANDROID_ICON = 'resources/android/icon/';
const SOURCE_ANDROID_SPLASH = 'resources/android/splash/';

const TARGET_ANDROID_ICON = 'android/app/src/main/res/';
const TARGET_ANDROID_SPLASH = 'android/app/src/main/res/';

const IOS_ICONS = [
  { source: 'icon-20.png', target: 'AppIcon-20x20@1x.png' },
  { source: 'icon-20@2x.png', target: 'AppIcon-20x20@2x.png' },
  { source: 'icon-20@2x.png', target: 'AppIcon-20x20@2x-1.png' },
  { source: 'icon-20@3x.png', target: 'AppIcon-20x20@3x.png' },
  { source: 'icon-29.png', target: 'AppIcon-29x29@1x.png' },
  { source: 'icon-29@2x.png', target: 'AppIcon-29x29@2x.png' },
  { source: 'icon-29@2x.png', target: 'AppIcon-29x29@2x-1.png' },
  { source: 'icon-29@3x.png', target: 'AppIcon-29x29@3x.png' },
  { source: 'icon-40.png', target: 'AppIcon-40x40@1x.png' },
  { source: 'icon-40@2x.png', target: 'AppIcon-40x40@2x.png' },
  { source: 'icon-40@2x.png', target: 'AppIcon-40x40@2x-1.png' },
  { source: 'icon-40@3x.png', target: 'AppIcon-40x40@3x.png' },
  { source: 'icon-60@2x.png', target: 'AppIcon-60x60@2x.png' },
  { source: 'icon-60@3x.png', target: 'AppIcon-60x60@3x.png' },
  { source: 'icon-76.png', target: 'AppIcon-76x76@1x.png' },
  { source: 'icon-76@2x.png', target: 'AppIcon-76x76@2x.png' },
  { source: 'icon-83.5@2x.png', target: 'AppIcon-83.5x83.5@2x.png' },
  { source: 'icon-1024.png', target: 'AppIcon-512@2x.png' }
];
const IOS_SPLASHES = [
  { source: 'Default-Portrait@~ipadpro.png', target: 'splash-2732x2732.png' },
  { source: 'Default-Portrait@~ipadpro.png', target: 'splash-2732x2732-1.png' },
  { source: 'Default-Portrait@~ipadpro.png', target: 'splash-2732x2732-2.png' }
];

const ANDROID_ICONS = [
  { source: 'drawable-ldpi-icon.png', target: 'drawable-hdpi-icon.png' },
  { source: 'drawable-mdpi-icon.png', target: 'mipmap-mdpi/ic_launcher.png' },
  { source: 'drawable-mdpi-icon.png', target: 'mipmap-mdpi/ic_launcher_round.png' },
  { source: 'drawable-mdpi-icon.png', target: 'mipmap-mdpi/ic_launcher_foreground.png' },
  { source: 'drawable-hdpi-icon.png', target: 'mipmap-hdpi/ic_launcher.png' },
  { source: 'drawable-hdpi-icon.png', target: 'mipmap-hdpi/ic_launcher_round.png' },
  { source: 'drawable-hdpi-icon.png', target: 'mipmap-hdpi/ic_launcher_foreground.png' },
  { source: 'drawable-xhdpi-icon.png', target: 'mipmap-xhdpi/ic_launcher.png' },
  { source: 'drawable-xhdpi-icon.png', target: 'mipmap-xhdpi/ic_launcher_round.png' },
  { source: 'drawable-xhdpi-icon.png', target: 'mipmap-xhdpi/ic_launcher_foreground.png' },
  { source: 'drawable-xxhdpi-icon.png', target: 'mipmap-xxhdpi/ic_launcher.png' },
  { source: 'drawable-xxhdpi-icon.png', target: 'mipmap-xxhdpi/ic_launcher_round.png' },
  { source: 'drawable-xxhdpi-icon.png', target: 'mipmap-xxhdpi/ic_launcher_foreground.png' },
  { source: 'drawable-xxxhdpi-icon.png', target: 'mipmap-xxxhdpi/ic_launcher.png' },
  { source: 'drawable-xxxhdpi-icon.png', target: 'mipmap-xxxhdpi/ic_launcher_round.png' },
  { source: 'drawable-xxxhdpi-icon.png', target: 'mipmap-xxxhdpi/ic_launcher_foreground.png' }
];
const ANDROID_SPLASHES = [
  { source: 'drawable-land-mdpi-screen.png', target: 'drawable/splash.png' },
  { source: 'drawable-land-mdpi-screen.png', target: 'drawable-land-mdpi/splash.png' },
  { source: 'drawable-land-hdpi-screen.png', target: 'drawable-land-hdpi/splash.png' },
  { source: 'drawable-land-xhdpi-screen.png', target: 'drawable-land-xhdpi/splash.png' },
  { source: 'drawable-land-xxhdpi-screen.png', target: 'drawable-land-xxhdpi/splash.png' },
  { source: 'drawable-land-xxxhdpi-screen.png', target: 'drawable-land-xxxhdpi/splash.png' },
  { source: 'drawable-port-mdpi-screen.png', target: 'drawable-port-mdpi/splash.png' },
  { source: 'drawable-port-hdpi-screen.png', target: 'drawable-port-hdpi/splash.png' },
  { source: 'drawable-port-xhdpi-screen.png', target: 'drawable-port-xhdpi/splash.png' },
  { source: 'drawable-port-xxhdpi-screen.png', target: 'drawable-port-xxhdpi/splash.png' },
  { source: 'drawable-port-xxxhdpi-screen.png', target: 'drawable-port-xxxhdpi/splash.png' }
];

function copyImages(sourcePath, targetPath, images) {
  for (const icon of images) {
    let source = sourcePath + icon.source;
    let target = targetPath + icon.target;
    fs.copyFile(source, target, err => {
      if (err) throw err;
      console.log(<code>${source} >> ${target}</code>);
    });
  }
}

copyImages(SOURCE_IOS_ICON, TARGET_IOS_ICON, IOS_ICONS);
copyImages(SOURCE_IOS_SPLASH, TARGET_IOS_SPLASH, IOS_SPLASHES);

copyImages(SOURCE_ANDROID_ICON, TARGET_ANDROID_ICON, ANDROID_ICONS);
copyImages(SOURCE_ANDROID_SPLASH, TARGET_ANDROID_SPLASH, ANDROID_SPLASHES);
(c) information : This script comes from this tutorial
Then we can add "resources": "cordova-res ios && cordova-res android && node scripts/resources.js" to scripts in package.json :
"scripts": {
    "ng": "ng",
    "start": "ng serve",
    "build": "ng build",
    "test": "ng test",
    "lint": "ng lint",
    "e2e": "ng e2e",
    "resources": "cordova-res ios && cordova-res android && node scripts/resources.js"
  },
And now each time we want to generate our application icons and splashcreen (for different devices screen sizes), we can launch the command:
npm run resourcesNow if run again our application, the application icon should have change on your mobile/simulator home screen, and the splashscreen should be the new one.
Add Splashscreen
To manage Splashscreen displays, we can install the Capacitor Splashscreen plugin
npm install @capacitor/splash-screen
npx cap sync
Please notice the sync keywork since we installed a new plugin.
Now we will modify the capacitor.config.ts file (in chattuto folder), to configure some default options:
import { CapacitorConfig } from '@capacitor/cli';

const config: CapacitorConfig = {
  appId: 'com.idevotion.chattuto',
  appName: 'ChatTuto',
  webDir: 'www',
  bundledWebRuntime: false,
  "plugins": {
    "SplashScreen": {
      "launchAutoHide": false,
      "androidScaleType": "CENTER_CROP",
      "androidSpinnerStyle": "large",
      "iosSpinnerStyle": "large",
      "spinnerColor": "#ffffff",
      "showSpinner": true,
      "splashFullScreen": true,
      "splashImmersive": true
    }
  }
};

export default config;
You can learn more about available options in the Capacitor documentation but one of the most important option is :
"launchAutoHide": false,By default Capacitor will automatically hide the Splashscreen after an amount of time. Using this option let’s us manage the show/hide of the Splashscreen from the code.
In our code, we can have 2 options : the user is unauthenticated (application goes to login page) or is authenticated and the application goes to the HomePage.
Let’s edit these two files, to manage the Splashscreen and hide it when our page is ready. It’s quite easy, first we need to import the Splashscreen library
import { SplashScreen } from '@capacitor/splash-screen';and then when our view is ready we can hide this splashscreen.
 ngAfterViewInit() {
    SplashScreen.hide()
  }
To test our code, we need to build our project
ionic build --prodand then launch again (i’m testing on iOS)
npx cap copy ios
npx cap run ios
To verify it is working fine, comment the line:
//SplashScreen.hide()build and run again, and the splashscreen will never hide.
Voila now you know how to manage the Splashscreen. Because sometimes it can be useful to let the splashscreen showned while doing some heavy tasks.
But don’t remember a good application should show the page as quick as possible and avoid showing a splashscreen for a long time.
This is also the main reason why i’m hiding the Splashscreen as soon as possible. Because default Capacitor time for hiding automatically Splashscreen can be 3 seconds so user will wait and see Splashscreeen during 3 seconds even if the app is ready and could be showned within 1 second.
Manage Pause or Resume (Background/Foreground) status
It can be really helpful to know if the application is going to foreground or background state. Foreground means that the user launchs the application, and background that he leaves the application.
To know and observe our application state, we can install the Capacitor App plugin.
npm install @capacitor/app
npx cap sync
Now to use it, edit the app.component.ts file and import the library
import { App } from '@capacitor/app';Then we can create a method to watch the events of the application:
import { Component } from '@angular/core';
import { App } from '@capacitor/app';

@Component({
  selector: 'app-root',
  templateUrl: 'app.component.html',
  styleUrls: ['app.component.scss'],
})
export class AppComponent {

  constructor() {
    this.initApplication()
  }

 initApplication(){

      App.addListener('appStateChange', ({ isActive }) => {
        console.log('App state changed. Is active?', isActive);
        if (isActive){
          console.log("Application is foreground")
        }
        else{
          console.log("Application is background ")
        }
      });
  }
}
the isActive variable tells us if the application is active (meaning foreground) or no (background).
Run the application again and click on the Home button of the simulator or your iphone device and you will see in Xcode logs:
[log] - App state changed. Is active? false
⚡️  [log] - Application is background
Now click again the icon of your application and you will see:
[log] - App state changed. Is active? true
⚡️  [log] - Application is foreground
Of course when launching the application for the first time or when the application has been killed by the device os, and launched again, no trace will be displayed because the plugin will be initialize from start and appState didn’t change.
The same behaviour is also possible using Platform and the events resume and pause which comes from Ionic. Let’s modify our app.component.ts file with the following code:
import { Component } from '@angular/core';
import { App } from '@capacitor/app';
import { Platform } from '@ionic/angular';

@Component({
  selector: 'app-root',
  templateUrl: 'app.component.html',
  styleUrls: ['app.component.scss'],
})
export class AppComponent {

  constructor(public platform:Platform) {
    this.initApplication()
  }

  initApplication(){

     //Subscribe on resume
     this.platform.resume.subscribe(() => {
      console.log("foreground ")
     })

    // Quit app
    this.platform.pause.subscribe(() => {
      console.log("goes to background ")

    });

      // App.addListener('appStateChange', ({ isActive }) => {
      //   console.log('App state changed. Is active?', isActive);
      //   if (isActive){
      //     console.log("Application is foreground")
      //   }
      //   else{
      //     console.log("Application is background ")
      //   }
      // });
  }
}
Try again the application and same as before you should see the different states.
It’s up to you to decice which method you would like to use.
Update User based on Foreground/Background state
You may wonder why it should be useful to know when the application is in foreground or background. As concrete example, let’s go back to our User model definion in our backend. We have the fields:
is_active = models.BooleanField(_('active'), default=True)
lastConnexionDate = models.DateTimeField(null=True, blank=True)
So now by managing application state, we can update these fields to set correct values.
When application launchs the user is active and we can update the lastConnexionDate and when the user leaves the application, he is not active anymore.
Here is the updated code of our app.component.ts file :
import { Component } from '@angular/core';
import { App } from '@capacitor/app';
import { Platform } from '@ionic/angular';
import { User } from './models/user';
import { ApiserviceService } from './services/api-service.service';
import { UserManagerServiceService } from './services/user-manager-service.service';

@Component({
  selector: 'app-root',
  templateUrl: 'app.component.html',
  styleUrls: ['app.component.scss'],
})
export class AppComponent {

   constructor(public platform:Platform,
    public apiService:ApiserviceService,
    public userService: UserManagerServiceService) {
    // When application launchs for first time
    this.userService.getUser().then((user:User)=>{
        if (user){
          this.setActiveAndLastDate(user)
        }
    })
    this.initApplication()
  }

  initApplication(){
      // App already launches and state change
      App.addListener('appStateChange', ({ isActive }) => {
        if (isActive){
          console.log("Application is foreground")
          this.userService.getUser().then((user:User)=>{
            if (user){
              this.setActiveAndLastDate(user)
            }
          })

        }
        else{
          console.log("Application is background ")
          this.userService.getUser().then((user:User)=>{
            if (user){
              this.setInactive(user)
            }
          })
        }
      });
  }

  setActiveAndLastDate(user:User){

  }

  setInactive(user:User){

  }
}
Now we need to write the code of the methods setActiveAndLastDate and setInactive methods:
 setActiveAndLastDate(user: User) {
    if (this.apiService.networkConnected) {
      this.apiService.showLoading().then(() => {
        this.apiService.showLoading().then(() => {
          let params = {
            "is_active": true,
            "lastConnexionDate": new Date()
          }
          this.apiService.updateUser(user.id, params).subscribe((done) => {
            this.apiService.stopLoading()
          })
        })
      })
    }
  }

  setInactive(user: User) {
    if (this.apiService.networkConnected) {
      this.apiService.showLoading().then(() => {
        let params = {
          "is_active": false
        }
        this.apiService.updateUser(user.id, params).subscribe((done) => {
          this.apiService.stopLoading()
        })
      })
    }
  }
First we check if the network is connected using our ApiService networkConnected variable. And if so, we update the User with our updateUser methods.
Warning : Modifying the is_active field for a Django user is really a bad idea, because Django will consider that the User is not active anymore (as we asked) and so the User will not be able to login again to the application… If you want to manage the online/offline presence of the User as we will learn later, we should add a new field to Django User and not using the is_active one.
Please comment the setInactive method calls to avoid error with logins.
Manage Network events
The apiService.networkConnected is a variable managed by our ApiService based on Network events. We can study this method now that we know Capacitor better. At the beginning of our tutorial, when we created the Ionic application, we have installed the Capacitor Network library.
When the ApiService initialize it calls a initializeNetworkEvents() method :
constructor(public http: HttpClient,
    public loadingController: LoadingController,
    public alertCtrl: AlertController,
    public platform: Platform) {

    this.initializeNetworkEvents();
    this.initProvider(domainConfig.virtual_host, domainConfig.client, "api")
    this.http = http
  }
which is really simple and use the Capacitor network plugin to check the status of the network, and update the networkConnected variable based on the status received.
 public async initializeNetworkEvents() {
    console.log("======== Initialise Network Events ======")
    if (this.platform.is("capacitor")) {
      let status = await Network.getStatus();
      if (status["connected"] == false) {
        this.networkConnected = false
        this.updateNetworkStatus(ConnectionStatus.Offline);
      }
      else {
        this.networkConnected = true;
        this.updateNetworkStatus(ConnectionStatus.Online);
      }
      let handler = Network.addListener('networkStatusChange', (status) => {
        console.log("Network status changed", status);
        if (status["connected"] == false) {
          this.networkConnected = false
          this.updateNetworkStatus(ConnectionStatus.Offline);
        }
        else {
          this.networkConnected = true;
          this.updateNetworkStatus(ConnectionStatus.Online);
        }
      });
    }
    else {
      if (navigator.onLine) {
        this.updateNetworkStatus(ConnectionStatus.Online);
      }
      else {
        this.updateNetworkStatus(ConnectionStatus.Offline);
      }
    }
  }

  private async updateNetworkStatus(status: ConnectionStatus) {
    this.status.next(status);
    this.networkConnected = status == ConnectionStatus.Offline ? false : true;
    console.log("networkConnected " + this.networkConnected)
  }
Learn to code/debug with hot live reload !
We learned how to deploy our code to a simulator or a device but on each modification we had to build and copy the code again and again. When developping and testing on a browser (with Ionic serve), on each modification, Ionic detect the change and reload the browser automatically. This behaviour is super useful to develop and debug rapidly.
What about Capacitor ? Should it be great if we could develop and debug at same time on our Simulator / Device and/or in our Browser ?
In Fact it is possible with the –live-reload option. This command is really magic and will improve a lot your development time.
ionic capacitor run ios -l --externalor ionic capacitor run android -l –external if you want to test on an android mobile device.
The -l option is a shortcut for –live-reload.
The –external is for using all network interfaces available
If you are testing on a real device, please be sure that your device is connected and using the same WIFI hotspot than your computer, otherwise the device will be unable to find your ionic server.
When running Ionic with that command, you will be able to test your application:
- On browser
- On iOS
- On Android
At the same time ! Yes really…
You will need a Mac with lot of memory to launch Xcode and Android Studio at the same time (16 Go at least).
And if you modify your Ionic code, Browser, iOS device/simulator and Android device/simulator will refresh automatically.
Wow really really great feature.
Please notice that sometimes application will not refresh in XCode or Android Studio. Just stop your app running and click the button of your IDE to run it again.
The source code for this tutorial is available on my GitHub repository.
Questions/Answers
- What is the framework to deploy Ionic application on a real device ?
Capacitor
- If we want to access native functionality what should we used ?
Existing Capacitor plugins (https://capacitorjs.com/docs/apis) or Community plugin (https://capacitorjs.com/docs/plugins/community) or even develop our own native plugin (https://capacitorjs.com/docs/plugins/creating-plugins)
- What is the command to update our code in the native project (ios and android) (many answers possible)
npx cap copy or npx cap sync or npx cap copy ios or npx cap copy android or npx cap sync ios or npx cap sync android
- With Ionic coupled to Capacitor it is possible to develop and test a PWA (progressive web app) and native application at the same time. True or False ?
True