- Share on
Create a Ionic 4 application - Part 2
DAY 3 - March 2019Even better if you want to render your app as it will render on iOS or Android, direclty on your browser, just launch in your terminal the command:
ionic serve --lab
Answer yes to the question to install required package, and now your browser will display:
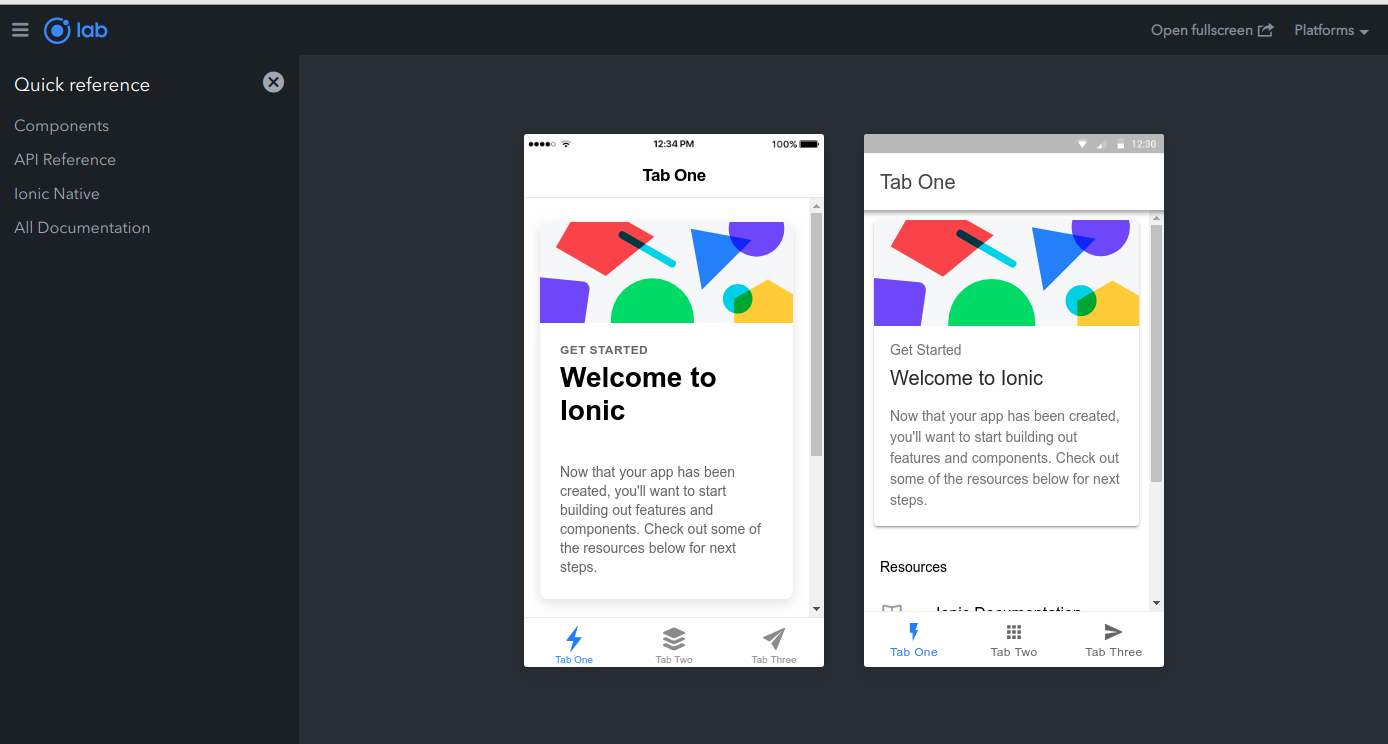
One screen is for iOS and other one is for Android.
Of course with ionic serve command (without --lab) you can still use Chrome or Safari developer extension to simulate the device that you want to use
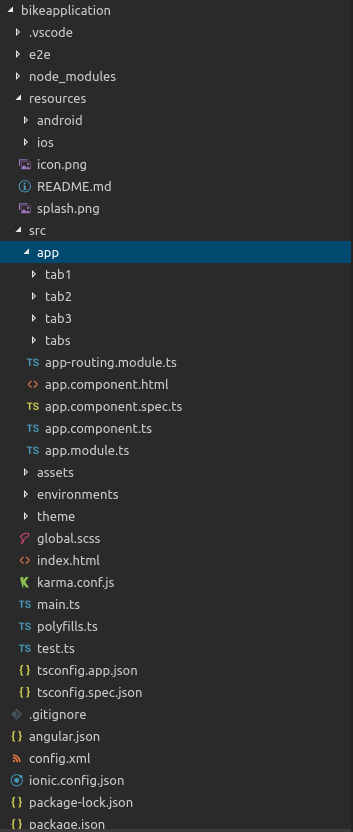
If we look at the code generated, we will see many directories and files:
| Main Directories to know | Explanations | |
| resources | Will contain our application logo and splashscreen images from which ionic will generate all files necessary to build ios and android application. | |
| src | The source code | |
Inside the src directory, we will find:
| Directory | Explanations | |
| app | The code that we will write using typescript langage | |
| assets | Will contain all files relative to fonts, images | |
| environments | 2 environment files one for production and one for development | |
| theme | Saas file (TheIonic css for our application) | |
I like to have a clean separation of things while doing development. So inside of app directory, i will create the following directories:
| Directory | Explanations | |
| constants | Will contain a file with all our constants | |
| models | Will contain all files relative to models | |
| pages | Will contain all pages of our ionic 4 application | |
| services | Will contain all services (called providers in Ionic 3) used by our ionic 4 application | |
If you look of files generated by our previous command ionic start bikeapplication tabs --cordova inside the app directory, you will see multiple tabs directories (tab1,tab2,tab3,tabs). These are the pages of the demo application, so i will move all this directories inside the newly created directory pages. Then i will edit the file app-routing.module.ts to modify the path of the pages that i just move:
import { NgModule } from '@angular/core';
import { PreloadAllModules, RouterModule, Routes } from '@angular/router';
const routes: Routes = [
  { path: '', loadChildren: './pages/tabs/tabs.module#TabsPageModule' }
];
@NgModule({
  imports: [
    RouterModule.forRoot(routes, { preloadingStrategy: PreloadAllModules })
  ],
  exports: [RouterModule]
})
export class AppRoutingModule {}
The important line modification is the:
{ path: '', loadChildren: './pages/tabs/tabs.module#TabsPageModule' }where i just indicate the ./pages/ folder in the path.
Now that we have the skeleton of our Ionic 4 bikeapplication, in the next tutorials we will see how to:
- Create an API service provider between Ionic 4 and our Django backend
- Create a backend API with Django Rest Framework
- Secure API between Ionic 4 and Django with oAuth2