- Share on
Django Rest Framework : How to create an API easily, part two
April 14, 2019Before to define some url endpoints, create a serializers.py file inside the api directory:
touch serializers.pyThis file will contain all serializers for our Django models. A serializer is a class to help converting our python model object into a JSON object, which can be understand by our api client (inside our Ionic project).
Our first endpoint, will be to get the list of existing users in our backend. So we need to add the following lines in our urls.py file inside our api directory:
from django.urls import path
from django.conf.urls import include
from rest_framework.routers import DefaultRouter
router = DefaultRouter()
from api.views import *
urlpatterns = [
    path('users/', UserListView.as_view(), name='users_list'),
    path('', include(router.urls))
]
With this code, we declare a new url which will be /users and which will use the views UserListView declare in a file views.py so let's create that file (still in our api directory):
touch views.pyAnd add the following code inside the views.py:
# *coding: utf-8*
from backoffice.models import User
from api.serializers import *
from rest_framework import generics
class UserListView(generics.ListAPIView):
    """
            get:
                Search or get users
    """
    queryset = User.objects.all()
    serializer_class = UserSerializer
With this code, we use the power of Django Rest Framework. We just need to tell django that our model is User, we define a queryset to get the data and we specify the class used to serialize data.
So we need to create our UserSerializer class. Inside the previously empty file serializers.py that we created, add the code:
from backoffice.models import *
from rest_framework import serializers
class UserSerializer(serializers.ModelSerializer):
    class Meta:
        model = User
        fields = '__all__'
It is still pretty simple and obvious. In the serializer, we say that we are using the User model and that we want to serialize all fields (meaning all fields will be part of the JSON response).
Now if you open your browser to the following url : http://127.0.0.1:8000/api/users/ you should see :
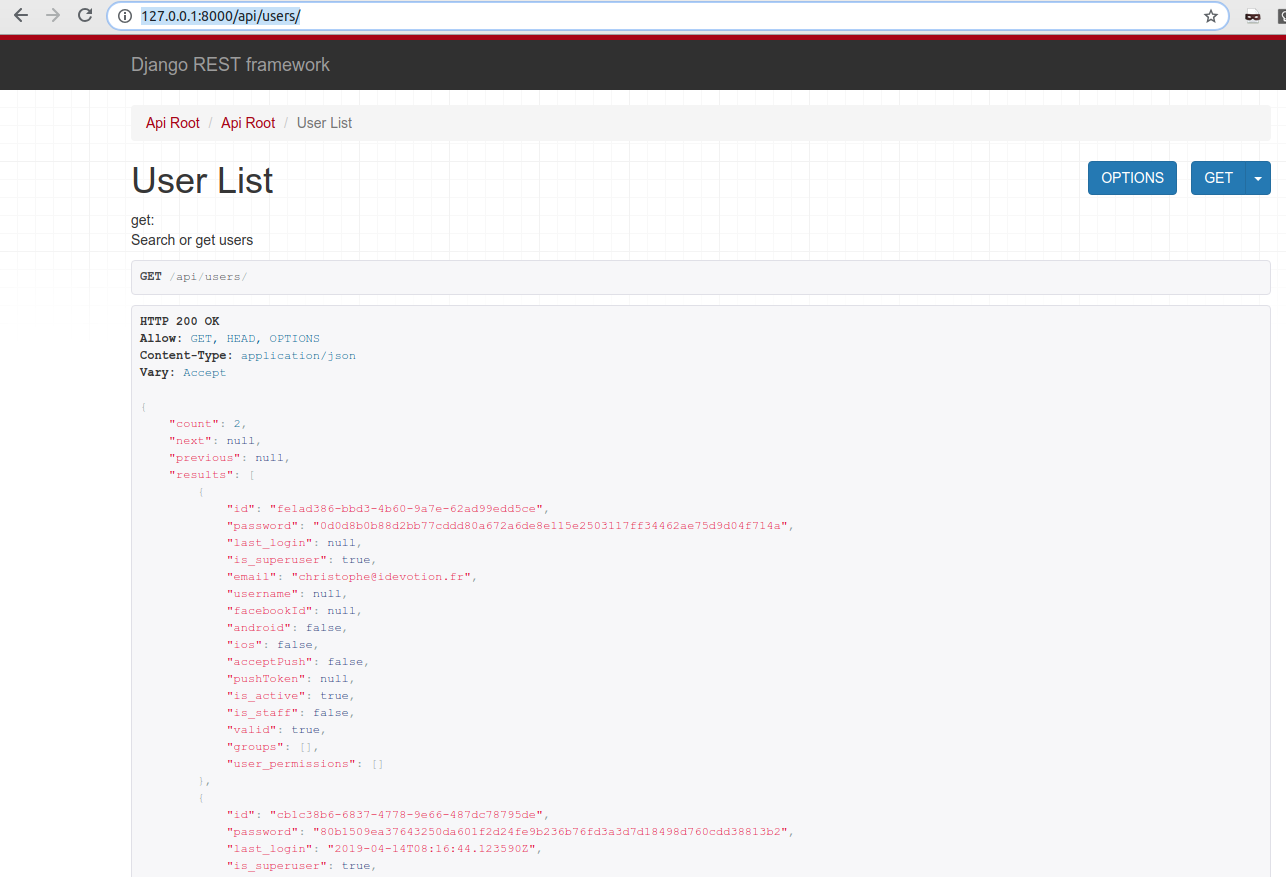
This is the JSON response that our API is sending back (as you can see Content-Type is application/json) with the existing users that i have created before in the database (with the admin interface). The count field indicates how many objects we have in our user list, the next and previous fields are used to indicate the pagination. Indeed if you remember in the settings.py file, we declare a
#Rest
REST_FRAMEWORK = {
...
'DEFAULT_PAGINATION_CLASS': 'rest_framework.pagination.PageNumberPagination',
'PAGE_SIZE': 20,
}
So Django Rest Framework will automatically paginate results 20 by 20.
Of course now you can call the API with your favorite tools (cURL, Postman...) and verify that you get data. But this time to introduce a new great library for Django Rest Framework which will generate our browsable documentation for our API plus a tool to test our endpoints (do Http request easily).
The library is called : Drf Docs but be careful, it's not working anymore with Django 2.x version. So instead we will use a fork of this library, which solve the Django 2.x problem plus another problem about regex urls. Don't worry about it and just add in the requirements.txt file, the line:
git+https://github.com/mago960806/django-rest-framework-docs.gitthen launch in terminal:
pip3 install -r requirements.txtDon't forget to collectstatic using
python3 manage.py collectstaticIn settings.py file, inside the INSTALLED_APPS add :
'rest_framework_docs',and in our global urls.py file, we declare the endpoint of our documentation:
path('doc/', include('rest_framework_docs.urls')),Now if your relaunch the project (python3 manage.py runserver) and open your browser to /doc url you should see:

This view list all endpoints available and each method available for the endpoint. To get the documentation and fields available, just click the HTTP Method that has been implemented in the API (only GET at the moment)
Now if you want to test your endpoint request, you can click to the icon next to the Options buttons, and you should see a popup opens:
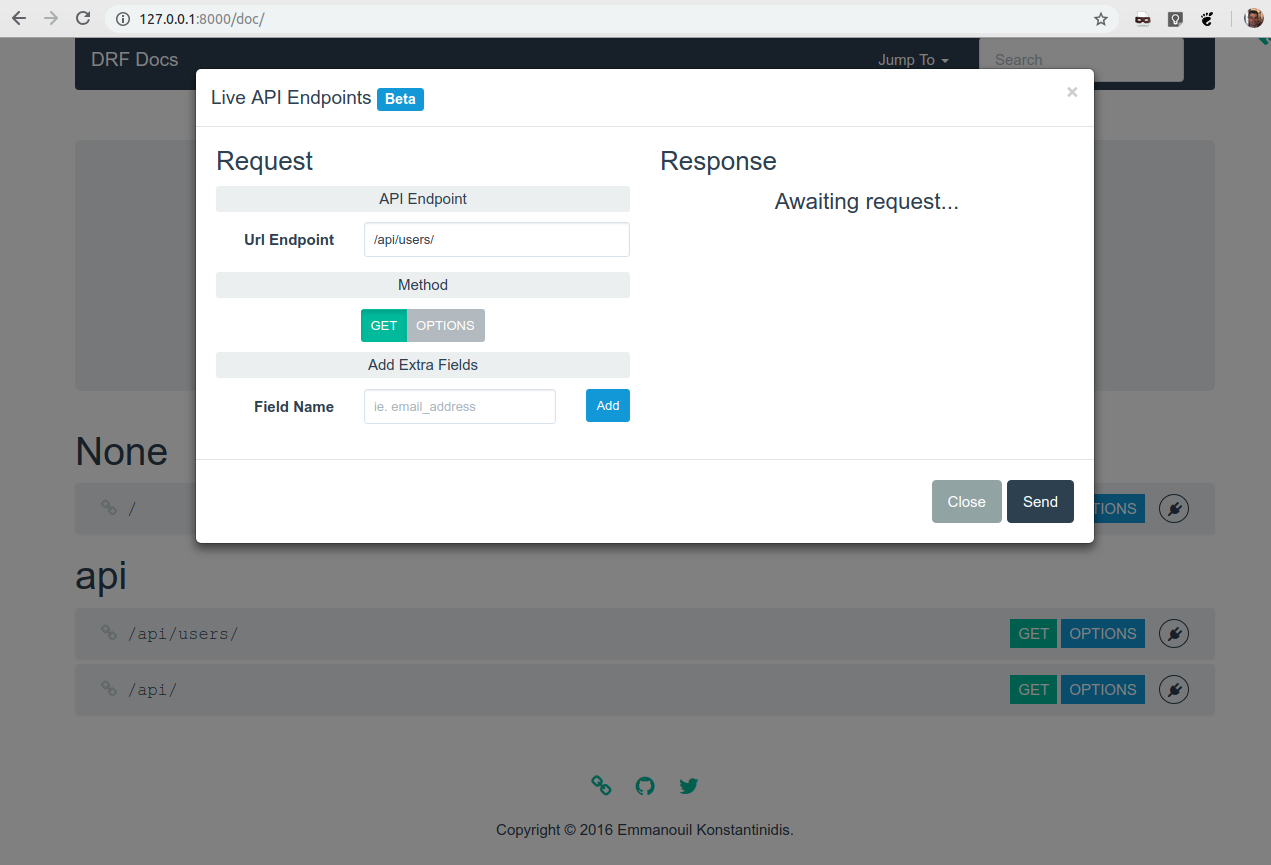
This is still in beta but i didn't have any issues so far (just remember it's a beta). Pretty awesome isn't it ?