- Share on
Django Rest Framework : How to create an API easily, part three
April 14, 2019How to filter with Django Rest framework ?
Our /users endpoint is nice to list the existing users in the database, but it could be nice if we could filter the results, such as searching a specific user. With this kind of filter, we could also implement a login/password verification in our Ionic project.
If you remember in our requirements.txt file, we added the line:
django-filterWith this library, we can now filter quite easily our data. In our settings.py file, inside the REST_FRAMEWORK definition, we add:
'DEFAULT_FILTER_BACKENDS': ('django_filters.rest_framework.DjangoFilterBackend',)Now modify the views.py file to add in the UserListView these two lines:
filter_backends = (DjangoFilterBackend,)
filterset_fields = ('email', 'username')
Full code should be:
# *coding: utf-8*
from backoffice.models import User
from api.serializers import *
from rest_framework import generics
from django_filters.rest_framework import DjangoFilterBackend
class UserListView(generics.ListAPIView):
"""
get:
Search or get users
"""
queryset = User.objects.all()
serializer_class = UserSerializer
filter_backends = (DjangoFilterBackend,)
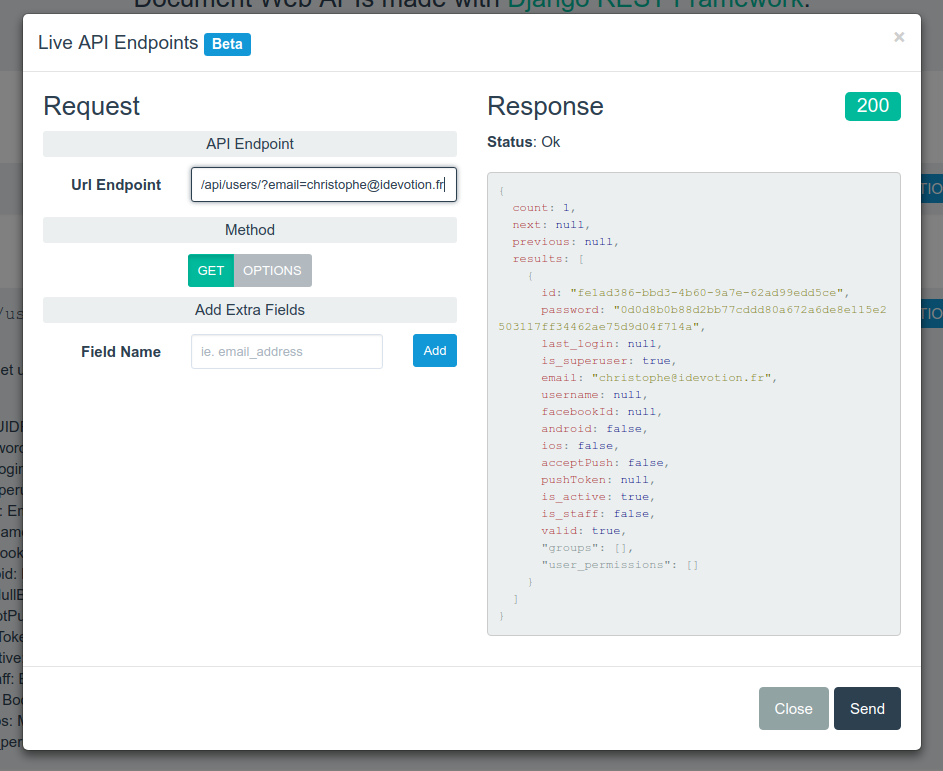
filterset_fields = ('email', 'username')The filterset_fields indicates on which fields (from our User model) we want to filter (email and username in my example). So now if i open the page to test the query again and add in my request path ?email=christophe@idevotion.fr, Django Rest Framework will filter results and sends back data only if a user with an email christophe@idevotion.fr is found.
We will see in a future tutorial how to do advanced filtering with Django Rest framework, but for now it is time to go back to our API itself and improve our endpoints.
How to create an object with Django Rest Framework
Listing users is a nice feature, but as we are creating a mobile application, we will need to be able to create users as well. As usual this is really simple. Just modify the views.py file and rename our class UserListView to UserListCreateView:
class UserListCreateView(generics.ListCreateAPIView):
    """
            create:
                add users
            get:
                Search or get users
                You can search using:
                    :param email
                    :param username
    """
    queryset = User.objects.all()
    serializer_class = UserSerializer
    filter_backends = (DjangoFilterBackend,)
    filterset_fields = ('email', 'username')
Please notice that the important line is :
generics.ListCreateAPIView
The UserListCreateView is just a name (i could have named it something else).
We also need to adapt our urls.py file inside the api folder, to indicate the new view name:
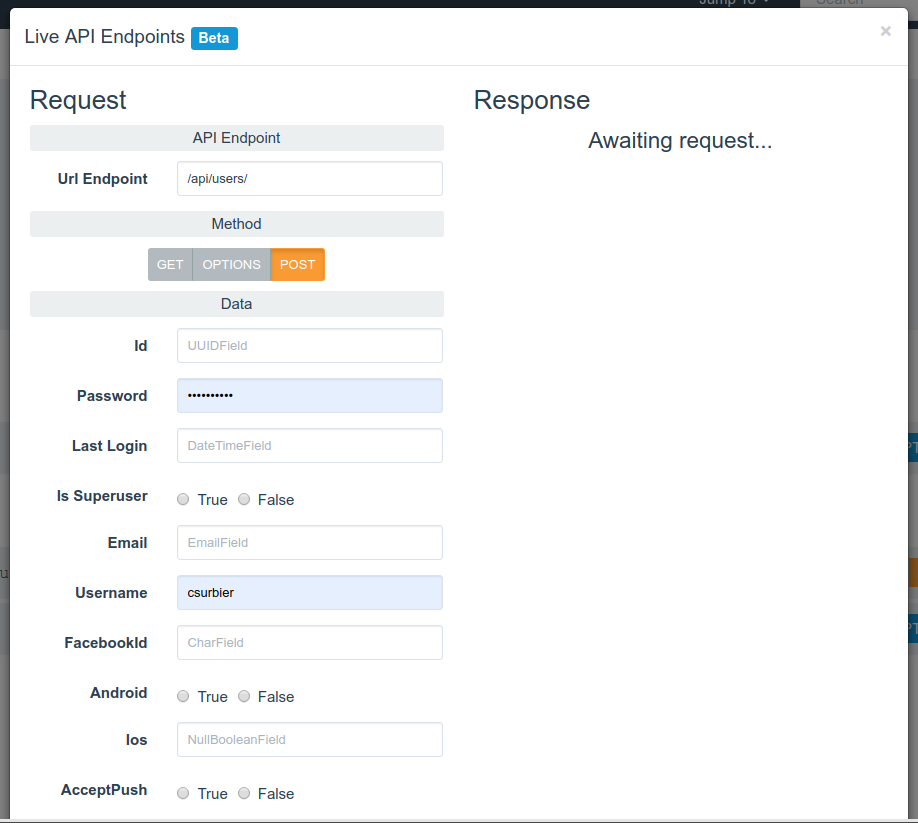
path('users/', UserListCreateView.as_view(), name='users_list'),Now if your reload your server and browser url, you should see a new HTTP method called POST
And if you open the test endpoint, you will see a form to let you fill in your values for the user you want to create.
Now it should be nice to have a specific endpoint to get information about a user and be able to modify or delete the user. So we will define a new endpoint in our urls.py file:
path('user/<uuid:pk>/', UserDetailView.as_view(), name='user_detail'),The new endpoint url is /user/<id>/, which means that if we add the <id> of the user, we can manipulate it. Inside the views.py file, we declare a new class:
class UserDetailView(generics.RetrieveUpdateDestroyAPIView):
    """
            get:
                get a specific user
            delete:
                Remove an existing user.
            patch:
                Update one or more fields on an existing user.
            put:
                Update a user.
    """
    queryset = User.objects.all()
    serializer_class = UserSerializer
So now you can take a specific user id that you obtain with the /users endpoint and call the new endpoint /user/ with this id.
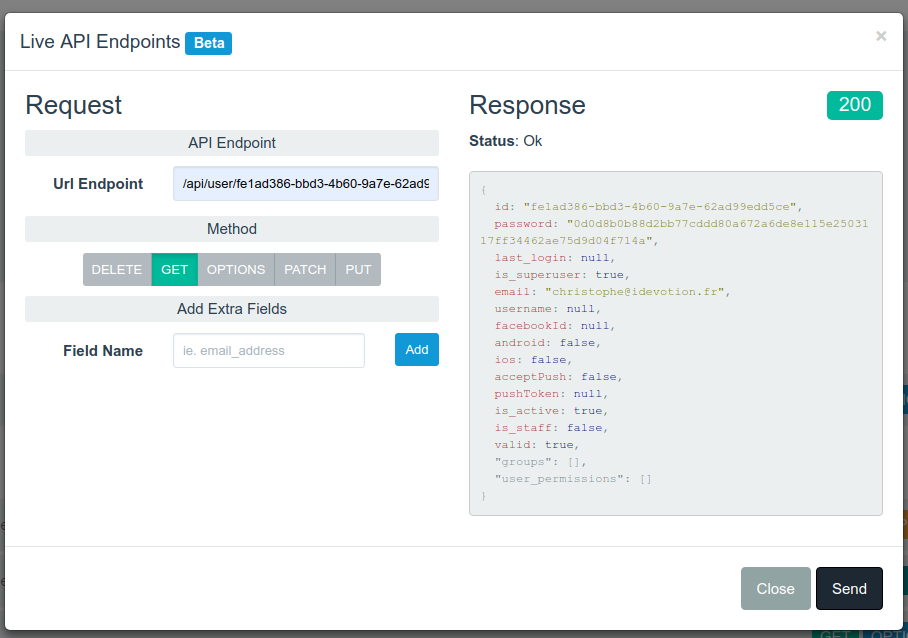
If you take a look at the new HTTP methods available for our new API endpoint, you should see

which means that now you can DELETE, UPDATE, GET on a user using the standard HTTP methods protocols. Of course this tutorial is not about explaining what is a REST API so if you want to learn more about the subject, just ask google or visit this site.
We will learn more about Django Rest Framework in other tutorials, but if you want don't hesitate to refer to the Django Rest Framework website
Now you can deploy the code in Clever Cloud as we have learn (git commit and git push) and find source code for this tutorial here
In next tutorial we will learn how to secure this API with oAuth2 and use it inside our Ionic project. Stay tuned.