
Recently, i had to develop a ionic application in which users should be able to take multiple photo with their camera. This will be the purpose of this tutorial.
First le’ts generate a new Ionic with capacitor project. Launch a terminal and enter:
ionic start multiplephoto blank --capacitor --project-id=multiplephoto --package-id=com.ionicanddjangotutorials.multiplephoto
Installing and using Media capture plugin with Ionic and Capacitor
To be able to access the mobile camera and implement our multiple photo functionnality, we will use the Media Capture plugin so let’s install it
npm install cordova-plugin-media-capture
npm install @ionic-native/media-capture
Now let’s modify the generated home.page.html file to add a button which will open the Camera preview on click
<ion-header [translucent]="true">
  <ion-toolbar>
    <ion-title>
      Multiple photo capture
    </ion-title>
  </ion-toolbar>
</ion-header>

<ion-content [fullscreen]="true">
  <div id="container">
    <strong>Ready to start?</strong>
    <ion-button color="primary" (click)="openCamera()">Take photos</ion-button>
  </div>
</ion-content>
and let’s adjust the home.page.scss for a better design
#container {
  display: flex;
  flex-direction: column;
  text-align: center;
  position: absolute;
  left: 0;
  right: 0;
  top: 10%;
}

#container strong {
  font-size: 20px;
  line-height: 26px;
}

#container p {
  font-size: 16px;
  line-height: 22px;
  color: #8c8c8c;
  margin: 0;
}

#container a {
  text-decoration: none;
}
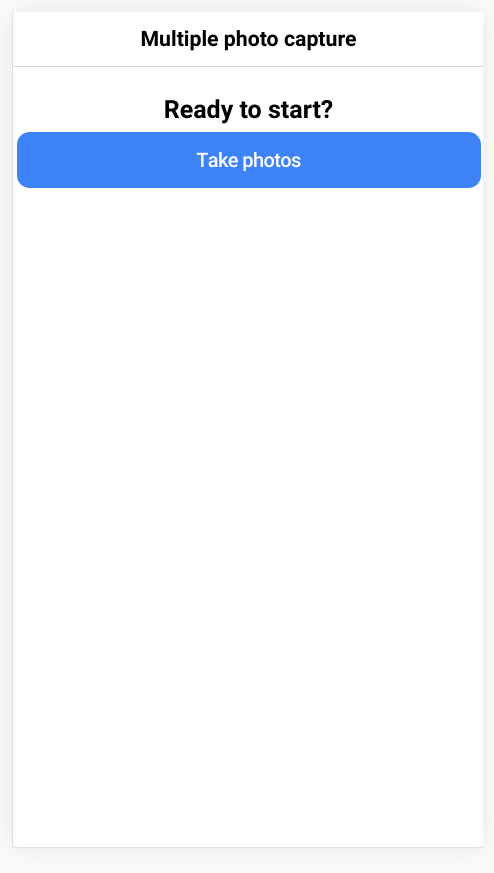
Our screen should look like this:
Ok now we can implement the openCamera() method in the home.page.ts file
import { Component } from '@angular/core';
import { MediaCapture, MediaFile, CaptureError, CaptureImageOptions } from '@ionic-native/media-capture/ngx';


@Component({
  selector: 'app-home',
  templateUrl: 'home.page.html',
  styleUrls: ['home.page.scss'],
})
export class HomePage {


  constructor(private mediaCapture: MediaCapture) {

  }

  openCamera(){
    let options: CaptureImageOptions = { limit: 3 }
    this.mediaCapture.captureImage(options).then((data: MediaFile[]) => {
      console.log(data)
    },
    (err: CaptureError) => {
      console.error(err)
    });
  }

}
and we need to modify the home.module.ts file to declare the MediaCapture provider plugin:
import { NgModule } from '@angular/core';
import { CommonModule } from '@angular/common';
import { IonicModule } from '@ionic/angular';
import { FormsModule } from '@angular/forms';
import { HomePage } from './home.page';

import { HomePageRoutingModule } from './home-routing.module';
import { MediaCapture } from '@ionic-native/media-capture/ngx';


@NgModule({
  imports: [
    CommonModule,
    FormsModule,
    IonicModule,
    HomePageRoutingModule
  ],
  providers:[MediaCapture],
  declarations: [HomePage]
})
export class HomePageModule {}
Ok lot of code but the most important part is the openCamera() method and more specifically the following instructions:
let options: CaptureImageOptions = { limit: 3 }
We indicate that the user would be able to take up to 3 photos. If you don’t specify a limit value the default will be only one photo. Once photos taken, we should receive an array with the images information or an error if something bad occured
this.mediaCapture.captureImage(options).then((data: MediaFile[]) => {
      console.log(data)
    },
    (err: CaptureError) => {
      console.error(err)
    });
Testing the photo capture on real device with capacitor
At this stage, we would like to run our app in a real mobile device to have a look of what’s happening and if everything is working fine. With capacitor, it is super easy to do so. First we build our app
ionic build
Then since i will test with an android device, i need to add the android platform to capacitor
npx cap add android
npx cap sync
Now i plug in my android device to usb port and launch the command
ionic capacitor run android --livereload --external
This command will open Android Studio and i just need to hit the run button. The Ionic application will be deployed on my android device with live mode, meaning that if i made a change in the code, the application will update automatically and reload to reflect the changes.
Please notice that your android device must be in debug mode if you want to run applications on it from Android Studio
If you are using an iPhone just do the same with npx cap add ios and ionic capacitor run ios –livereload –external
The application running on my android device, i can click the Take photo button and the camera preview appears and let me take one photo. Then the view briefly disappears and appears again and i can take another photo. Same process happens once more. Finally after my 3 photos capture, the camera preview closes and i can see in the logs:
http://192.168.1.51:8100/home-home-module.js - Line 200 - Msg: [object Object],[object Object],[object Object]
I have 3 objects in my array list which is a good news since i took 3 photos. For better debugging just change the console.log output to show json data
console.log(JSON.stringify(data))
[
{"name":"1597995590266.jpg",
"localURL":"cdvfile://localhost/sdcard/Pictures/1597995590266.jpg",
"type":"image/jpeg","lastModified":null,"lastModifiedDate":1597995598000,"size":5735308,"start":0,"end":0,
"fullPath":"file:///storage/emulated/0/Pictures/1597995590266.jpg"},{"name":"1597995598705.jpg",
"localURL":"cdvfile://localhost/sdcard/Pictures/1597995598705.jpg",
"type":"image/jpeg","lastModified":null,"lastModifiedDate":1597995603000,"size":5915682,"start":0,"end":0,
"fullPath":"file:///storage/emulated/0/Pictures/1597995598705.jpg"},{"name":"1597995603724.jpg","localURL":"cdvfile://localhost/sdcard/Pictures/1597995603724.jpg","type":"image/jpeg","lastModified":null,"lastModifiedDate":1597995609000,"size":5962056,"start":0,"end":0,"fullPath":"file:///storage/emulated/0/Pictures/1597995603724.jpg"}]
As expected the array contains the information about the 3 photos taken and where the files are stored.
The plugin behaviour/user experience is not so great because user needs to take 3 photos (not 2 or one) to exit the camera mode (or close the camera application).
Now if you want to read the files, i will suggest to use the Capacitor Filesystem plugin and more particulary the readFile methods
Then with the files, you can display them or send them to a server like we learned in this tutorial.
Read and display images taken with the media capture plugin into our Ionic application
Let’s modify our html page to display pictures in a grid:
<ion-header [translucent]="true">
  <ion-toolbar>
    <ion-title>
      Multiple photo capture
    </ion-title>
  </ion-toolbar>
</ion-header>

<ion-content [fullscreen]="true">
  <div id="container">
    <strong>Ready to start?</strong>
    <ion-button color="primary" (click)="openCamera()">Take photos</ion-button>

  <div class="section-body">
    <ion-row>
      <ion-col size="4" *ngFor="let item of pictures">
        <div class="image-card">
          <img [src]="item" alt="">
        </div>
      </ion-col>
    </ion-row>
  </div>

</div>
</ion-content>
Now we modify our code to use the Capacitor filesystem plugin , browse each photo of our array and add them to a the new array pictures which is displayed in our html page
import { Component, NgZone } from '@angular/core';
import { MediaCapture, MediaFile, CaptureError, CaptureImageOptions } from '@ionic-native/media-capture/ngx';
import { Plugins, FilesystemDirectory, FilesystemEncoding } from '@capacitor/core';
const { Filesystem } = Plugins;

@Component({
  selector: 'app-home',
  templateUrl: 'home.page.html',
  styleUrls: ['home.page.scss'],
})
export class HomePage {

  pictures=[]
  constructor(private mediaCapture: MediaCapture) {

  }

  openCamera(){
    let options: CaptureImageOptions = { limit: 1 }
    this.mediaCapture.captureImage(options).then(async (data: MediaFile[]) => {
      console.log(JSON.stringify(data))
      for (let photo of data){
        let fullPath = photo.fullPath
        try{
          let photoBinary = await Filesystem.readFile({path:fullPath})
          if (photoBinary.data){
            let fullData = "data:" + photo.type + ";base64," + photoBinary.data
            this.pictures.push(fullData)
          }

        }
        catch(error){
          console.log(error)
        }

      }
    },
    (err: CaptureError) => {
      console.error(err)
    });
  }

}
Capacitor readFile returns the binary data in a based64 encoded so we will use this value with the type value of the photo (image/jpeg) to be able to display it correctly in our img tag:
let photoBinary = await Filesystem.readFile({path:fullPath})
          if (photoBinary.data){
            let fullData = "data:" + photo.type + ";base64," + photoBinary.data
            this.pictures.push(fullData)
          }
Please notice that with Android 10 a change occurs and we need to add: android:requestLegacyExternalStorage=”true” into our AndroidManifest.xml file otherwise the application will crash
<application
        android:allowBackup="true"
        android:icon="@mipmap/ic_launcher"
        android:label="@string/app_name"
        android:roundIcon="@mipmap/ic_launcher_round"
        android:supportsRtl="true"
        android:requestLegacyExternalStorage="true"
        android:theme="@style/AppTheme">