
In this tutorial we will learn how to scan a QR code or a barcode with Ionic / Capacitor and then use the Open Food Fact API to display information about the scanned product.
You can find the source code of this tutorial here
Creating our Ionic / Capacitor project
To create our application we need to type in a terminal, the following command
ionic start qrcodescanner blank --capacitor --project-id=qrcodescanner --package-id=com.idevotion.qrcodescanner
This will generate our Ionic project, then we can go in the created directory and launch our first build to verify everything is ok
ionic build
Install Barcode Scanner library and Capacitor Http library
Now we need to install the Barcode Scanner library to use it with Ionic and Capacitor, and we will use the Capacitor HTTP plugin to do our request to the Open Food Fact API, so we need to install it as well.
npm install phonegap-plugin-barcodescanner
npm install @ionic-native/barcode-scanner
npm install @capacitor-community/http
To use the barcodescanner plugin, we need to edit our app.module.ts file and import it
import { NgModule } from '@angular/core';
import { BrowserModule } from '@angular/platform-browser';
import { RouteReuseStrategy } from '@angular/router';

import { IonicModule, IonicRouteStrategy } from '@ionic/angular';
import { SplashScreen } from '@ionic-native/splash-screen/ngx';
import { StatusBar } from '@ionic-native/status-bar/ngx';

import { AppComponent } from './app.component';
import { AppRoutingModule } from './app-routing.module';

import { BarcodeScanner } from '@ionic-native/barcode-scanner/ngx';

@NgModule({
  declarations: [AppComponent],
  entryComponents: [],
  imports: [BrowserModule, IonicModule.forRoot(), AppRoutingModule],
  providers: [
    StatusBar,
    SplashScreen,
    BarcodeScanner,

    { provide: RouteReuseStrategy, useClass: IonicRouteStrategy }
  ],
  bootstrap: [AppComponent]
})
export class AppModule {}
Using the Barcodescanner library with Ionic 5
To use both libraries , we need to edit the default generated home.page.ts file and import it as well
import { Component } from '@angular/core';
import { BarcodeScanner } from '@ionic-native/barcode-scanner/ngx';
import '@capacitor-community/http';
import { Plugins } from '@capacitor/core';

@Component({
  selector: 'app-home',
  templateUrl: 'home.page.html',
  styleUrls: ['home.page.scss'],
})
export class HomePage {

  productInformation=null
  barCode:any;
  constructor(public barcodeScanner : BarcodeScanner) {}

}
Let’s edit the home.page.html file to add a button that will launch the barcode scanner.
<ion-header>
  <ion-toolbar color="primary">
    <ion-title>
      Barcode Scanner tutorial
    </ion-title>
  </ion-toolbar>
</ion-header>

<ion-content>
  <ion-card>
    <img src="productInformation.product.image_url"/>
    <ion-card-content>
      <ion-text>Scan a QRCode or Barcode to get the product information</ion-text>

      <ion-button color="success" expand="full" (click)="openBarCodeScanner()">Scan code</ion-button>
    </ion-card-content>
  </ion-card>

  <ion-grid>
    <ion-row>
      <ion-col class="justify-align-center"  *ngIf="barCode">
        <ion-text>{{barCode}}</ion-text>
      </ion-col>
    </ion-row>
    <ion-row>
      <ion-col class="justify-align-center"  *ngIf="productInformation">
        <ion-text>{{productInformation.product.product_name}} </ion-text>
      </ion-col>
    </ion-row>
  </ion-grid>
</ion-content>
The page will look like this
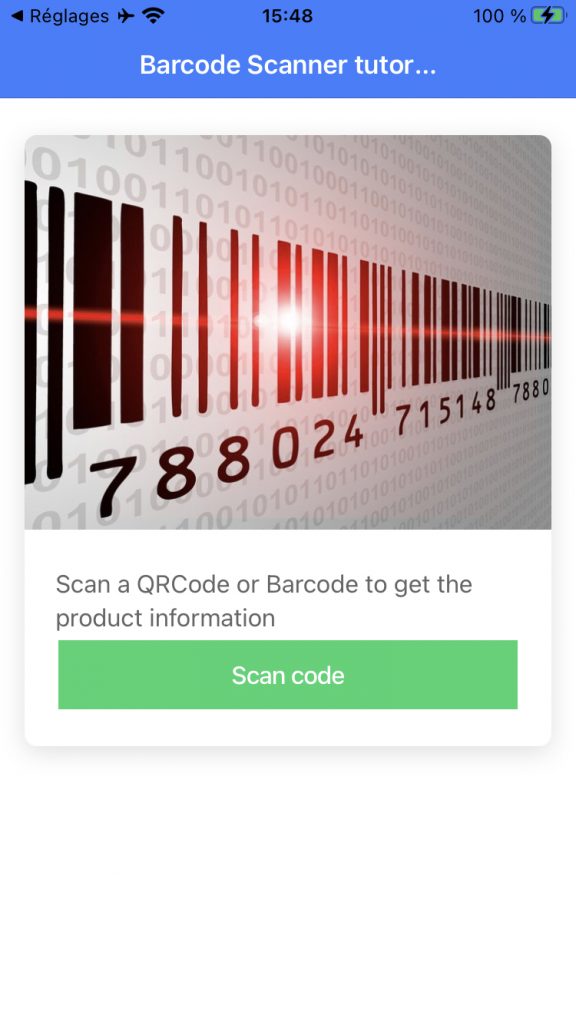
If a code is detected it will be displayed in a row with all information related to the scan
 <ion-row>
      <ion-col class="justify-align-center"  *ngIf="barCode">
        <ion-text>{{barCode}}</ion-text>
      </ion-col>
    </ion-row>
Once a code is detected, we will call Open Food fact API to get information about the scan product. Open Food Fact is an organisation referencing food products, so to get information you will need to scan something related to food. The product name will be displayed on another row
 <ion-row>
      <ion-col class="justify-align-center"  *ngIf="productInformation">
        <ion-text>{{productInformation.product.product_name}} </ion-text>
      </ion-col>
    </ion-row>
Ok now we can go back to the home.page.ts file and implement the openBarCodeScanner() method
openBarCodeScanner(){
    this.barcodeScanner.scan().then(barcodeData => {
      console.log('Barcode data', barcodeData);
      this.barCode = barcodeData
      //   Barcode data {"cancelled":0,"text":"8413384010008","format":"EAN_13"}
    }).catch(err => {
      console.log('Error', err);
    });
  }
At this stage, if you try to scan something on a real device, you should see the Barcode scanner view and then obtain the result in barcodeData variable.
Using Capacitor HTTP plugin to call Open Food Fact API
Now if we have a result meaning a scanned bar code, we can make our call to the Open Food Fact API, to check if we have information about the product. Let’s modify our code to do so:
  openBarCodeScanner(){
    this.barcodeScanner.scan().then(barcodeData => {
      console.log('Barcode data', barcodeData);
      this.barCode = barcodeData
      //   Barcode data {"cancelled":0,"text":"8413384010008","format":"EAN_13"}

      if (barcodeData) {
        let scanCode = barcodeData["text"];
        if (scanCode) {
          this.getProductWithBarCode(scanCode)
        }
      }
      else{
        console.log("=== No data scanned !")
      }
    }).catch(err => {
      console.log('Error', err);
    });
  }
If we have barcodeData, we can get the scan code like this
let scanCode = barcodeData["text"];
and then call the API
 if (scanCode) {
          this.getProductWithBarCode(scanCode)
 }
Let’s implement this getProductWithBarCode method
  async getProductWithBarCode(barcode){
    const { Http } = Plugins;
    let urlToCall = "https://fr.openfoodfacts.org/api/v0/produit/"+barcode+".json"
    let ret = await Http.request({
      method: 'GET',
      url: urlToCall,
      headers: {
        'content-type': 'application/json',
      }
    });
    console.log(ret.data)
    if (ret.data){
      this.productInformation = ret.data
      console.log("==Product ",this.productInformation.product)
    }
  }
Nothing really complicated. We use the Capacitor HTTP plugin to make a GET request and passing the scanned bar code.
If we have a result, we can set the product information and displays it in our page.
The Open Food Fact API returns a JSON with all information collected about the product so it can be a very long json. It’s up to you to extract the information you are interested in and display it or not.
Deploying on a device
To deploy on iOS:
ionic build --prod
npx cap sync ios
npx cap open ios
Xcode will open and you can run it on your iPhone.
To deploy on Android:
ionic build --prod
npx cap sync android
npx cap open android
As always with Capacitor plugin, one more step is required with Android. You need to register the HTTP plugin
import com.getcapacitor.plugin.http.Http;

public class MainActivity extends BridgeActivity {
  @Override
  public void onCreate(Bundle savedInstanceState) {
    super.onCreate(savedInstanceState);

    // Initializes the Bridge
    this.init(savedInstanceState, new ArrayList<Class<? extends Plugin>>() {{
      // Additional plugins you've installed go here
      // Ex: add(TotallyAwesomePlugin.class);
      add(Http.class);
    }});
  }
}